Turning the Wall Street II Pen
By George Snyder
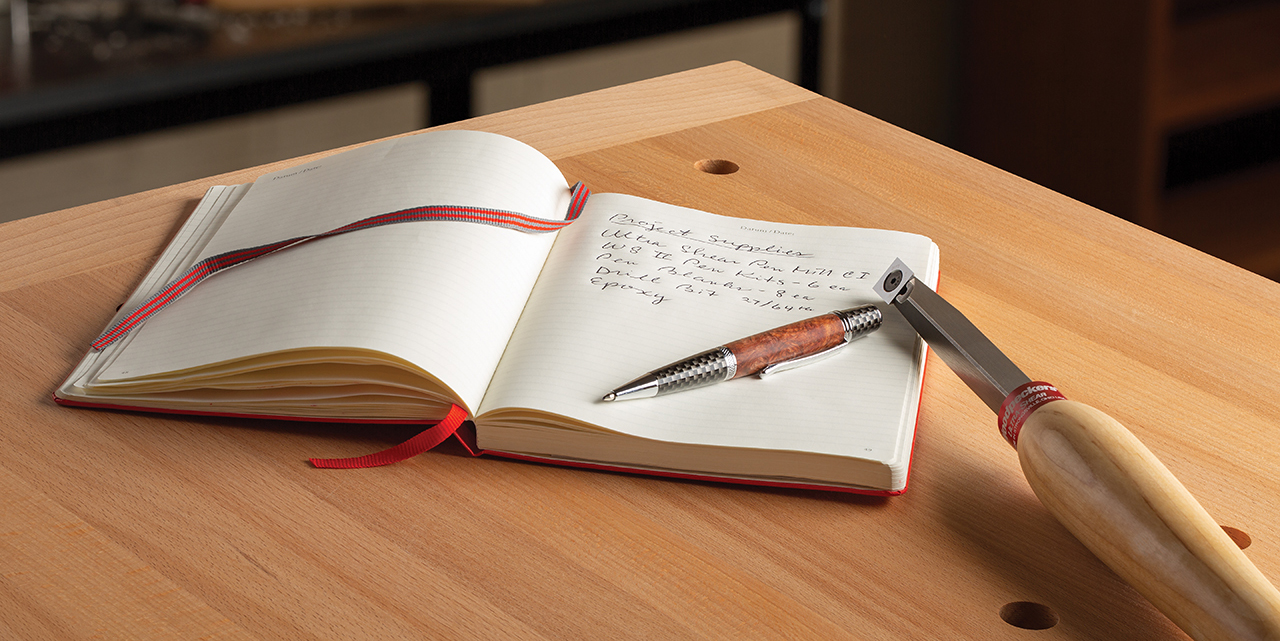
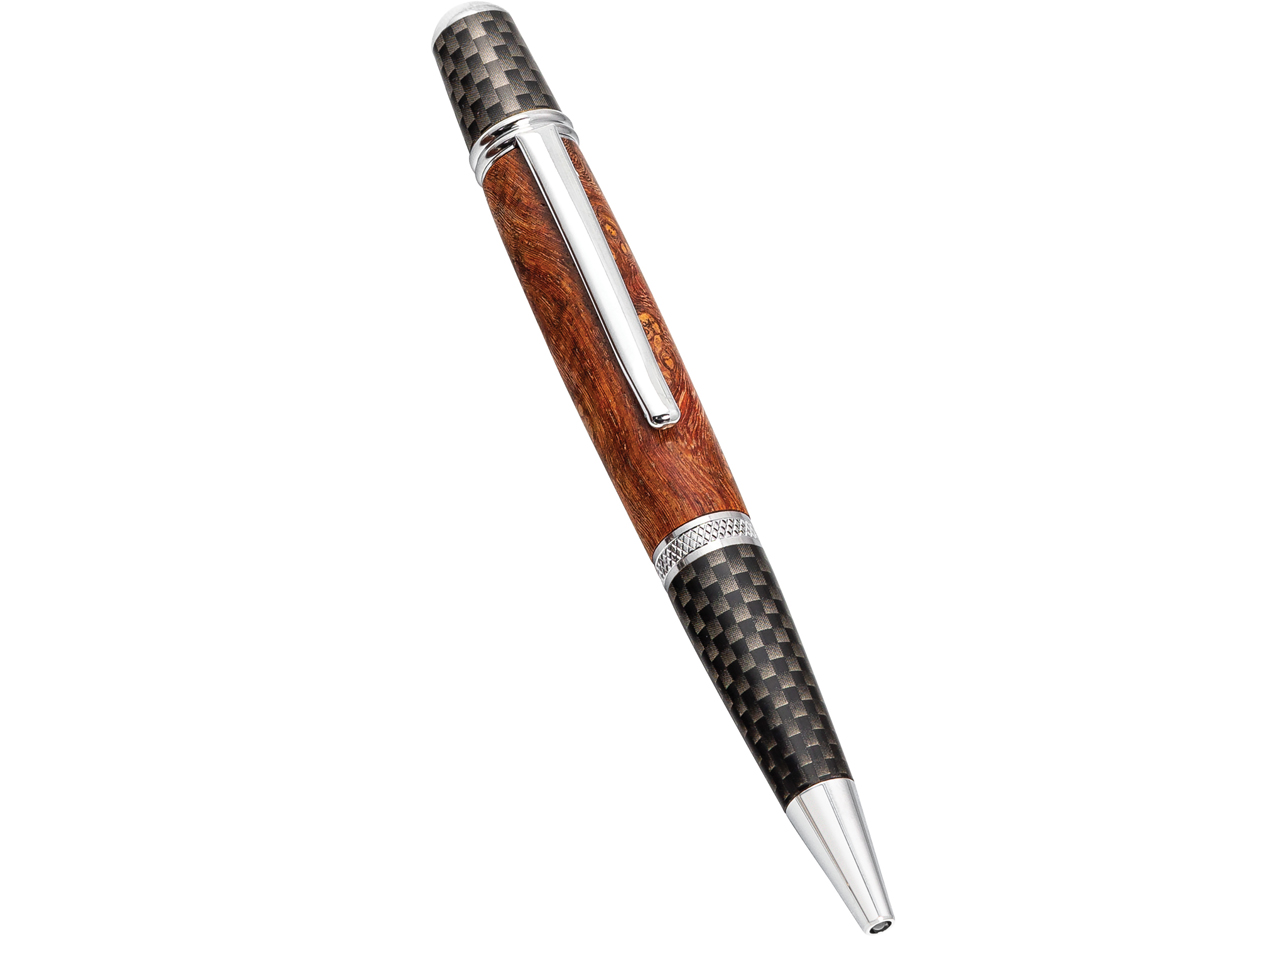
Gift giving seasons tend to sneak up on me. Everyone in my family expects hand-made gifts at every opportunity. Now, it’s late Spring, and by some twist of fate I have a rather large number of high school and college-aged nieces, nephews and neighbors all graduating within a few weeks of each other. I need a bunch of nice gifts, and I need them now. My “go-to” gift for these situations – particularly when I need a bunch – is the Wall Street II pen kit (also called the “Sierra” depending on where you buy it). The Wall Street II is one of the easiest pens to turn. It only takes one half of a standard pen blank, and the finished pen writes nicely and has great balance. What’s more, with a wide variety of trim styles and finishes, unless you’re an experienced pen turner, you would never guess that they’re all the same inside.
Selecting the blanks I’m going to turn is almost as much fun as giving the finished pens away. I love picking through the racks of exotic woods and crazy acrylic pen blanks. This time I ended up with two completely different materials, coffee beans cast in acrylic and stabilized Amboyna burl (yes, the coffee bean pen blank does smell like coffee). Amboyna burl comes from the Island of Borneo. On its own, it’s really tough stuff. It’s prone to moving and cracking, which is why I picked stabilized blanks. They’re less prone to twisting and cracking, but also tougher to turn.
Step one is cutting the blanks to size. Standard “off-the-shelf” blanks are approximately 3/4" x 3/4" x 5". I only need half of that for a Wall Street II. I used a Woodpeckers Edge Rule, setting the stop a little more than 1/8" past the 2-1/4" length of the kit’s brass tube. This gives me plenty of room to trim the ends down to the brass.
Personally, I hate cutting pen blanks on a table saw or miter saw. They’re just too darn small for me to feel comfortable working that close to the blade. I had my band saw all set up with a tiny little blade that takes forever to track, so I just decided to cut the pen blanks in a miter box with a hand saw.
Once cut to size, I located the center with an Ultra-Shear 2" Center Finder. This makes drilling the hole in the blank for the brass tube a bit easier. There’s a time and a place for cheap drill bits, but this isn’t it. These are tough materials and I want a straight, perfectly centered hole. That takes a sharp bit. I only use two types of bits for pen drilling, brad points and parabolic twist drills. Since I wasn’t sure how the coffee bean blank was going to machine, I opted for a brad point. The Wall Street II/Sierra takes a 27/64” bit.
I mounted the blanks in a drill press vise and carefully aligned the fence on my Woodpeckers Drill Press Table to the center of the blank in the vise. This makes for a stable and easily repeatable process. I drill at approximately 1000 rpm. It can vary by material. If I am drilling a large batch of acrylic blanks, I dip the drill bit in a cup of water mixed with a little dish washing soap to cool it down. Some folks will mist the blank as they are drilling. Some turners suggest drilling nearly all the way through the blank, but stopping short and cutting the end off. This can eliminate the chance for blowout. I just take it easy as I get almost through.
Once the holes are drilled in all the blanks, I prepare the brass tubes to be glued into the pen blanks. To make sure the adhesive adheres to the tubes I rough them up with abrasive pads or sandpaper. I like to use two-part epoxy to glue the tubes. Some people like CA, some like expanding polyurethane…all three work, but I like epoxy because it is gap filling, doesn’t foam all over the place and is dry and ready to turn in 15 or 20 minutes (with the “5 minute” kind).
Now it’s time for one of the two technically challenging steps in the pen turning process. Squaring up the pen blank needs to be done carefully. The ends of the blank need to be trimmed right down to the brass insert tube without shortening the tube more than a few thousandths of an inch. Woodpeckers Ultra-Shear Pen Mill-Cimakes this job much easier. It uses the same nano-grain carbide inserts used on the Ultra-Shear pen turning tools. The super-sharp inserts cut all types of materials cleanly and last through mountains of pen blanks. Perhaps best of all, when the edges do finally dull, you can just loosen the screws, rotate the inserts and get right back to work. The trimming head is guided by the Pilot/Reamer. The tip of the Pilot/Reamer will cut away any glue residue inside the brass tube. Woodpeckers makes 12 sizes of Pilot/Reamer fitting almost every pen kit on the market today.
I mounted the Pen Mill-Ci in my drill press with the 27/64" Pilot/Reamer installed. Note that the size on the Pilot/Reamers refers to the drill bit size for the insert tube, not the actual size of the Pilot/Reamer itself. I set the drill press speed to 800 RPM and inserted the blanks into the drill press vise. Taking light cuts, I got a very clean surface, even on the brittle cast material. I fed the mill into the blank until I saw the brass end suddenly turn very bright and shiny. That’s the cue to stop cutting. Most pen kits are somewhat forgiving on length, but you can’t put it back on, so being cautious on this step has benefits.
Now to the fun part…it’s time to turn! With a hole bored through the middle of the pen blank, it’s not possible to use traditional drive centers. The solution is a pen mandrel and bushing set. The pen mandrel has a Morse taper fitting, just like a regular drive center, but instead of spurs that bite into the end of the wood, it has a shaft that extends toward the tailstock. Every pen kit specifies a “bushing set”. The bushings fit over the mandrel shaft and snugly into the insert tube of the pen blank. The outside diameter of the bushing is carefully made to be the correct diameter for the finished turning. This creates a “target” for the turner.
I start by fitting the mandrel into the headstock of my lathe. Then slid on one bushing, the blank and the second bushing. I snapped the bushings into the blank and snugged it all up with the thumb wheel. Next, I spotted the tailstock live center into the end of the mandrel shaft and tightened it up until it was just snug.
Ultra-Shear carbide insert turning tools really shine when turning highly figured wood, all types of plastics and the trendy hybrid blanks that are both wood and plastic. The tough nano-grain carbide material stands up well to abrasion. The highly polished face and finely ground bevel cut cleanly. Add in the ability to shear scrape for a great surface finish and you have a turning tool that never needs sharpening, but rivals traditional tools for quality of cut.
The Wall Street II, like most pen kits, looks best with very little in the way of what most people consider “turning”. Adding beads and coves makes the pen look awkward. It really looks best with nothing more than one simple, subtle bulge in the middle. I do this with just one turning tool. I use the Ultra-Shear Pen Size Square with a 2" radius cutter (20126) from beginning to end.
I start by adjusting the tool rest so the edge of the cutter is on the centerline of the lathe when I hold it level. I err to the side of having the tool rest a tiny bit too high, rather than too low…there’s no penalty for angling the tool down to the work, but angling it up can cause a catch. I turn the blank down to a cylinder by just working back and forth along the tool rest, nudging the tool forward a fraction of an inch on each pass.
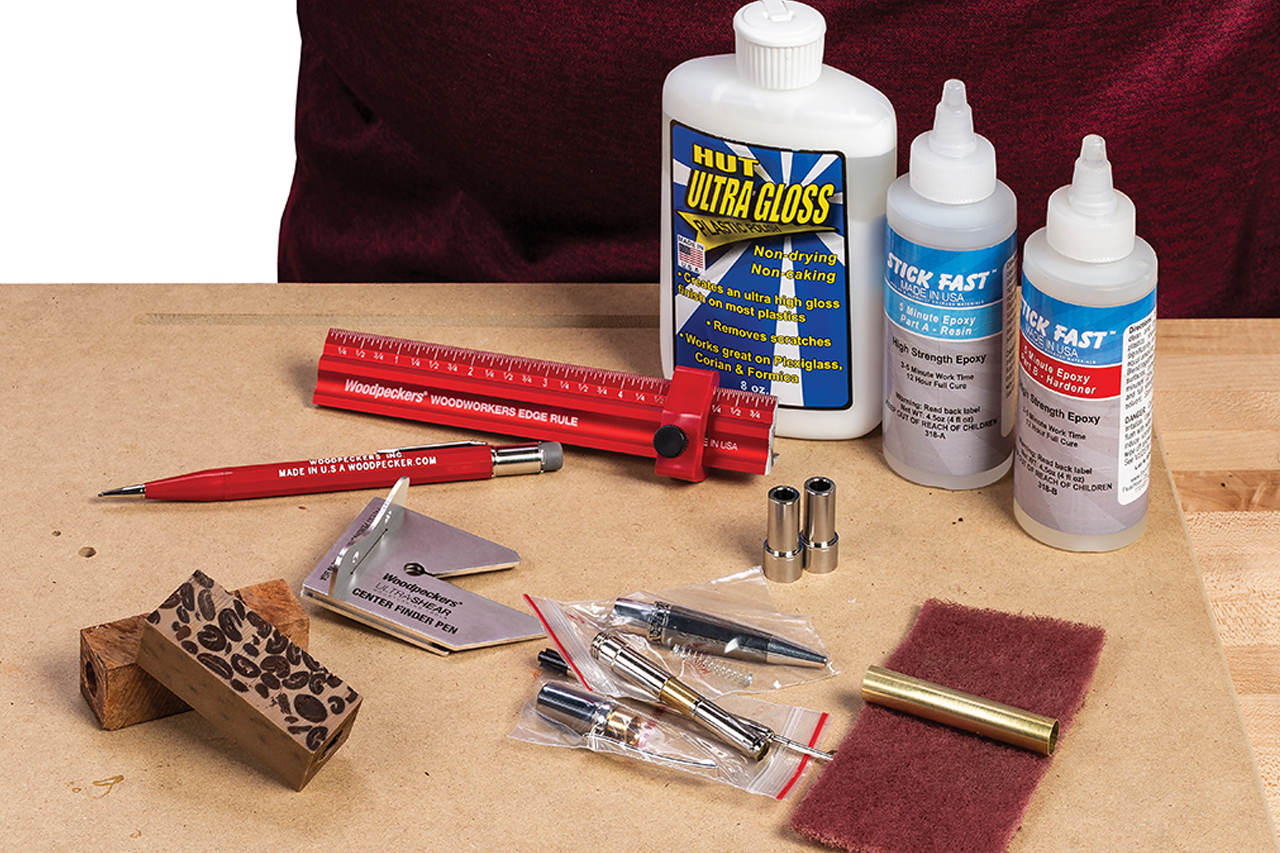
Everything needed to get a pen tool turning project underway. Pen kit, pen blanks, center finder, Edge Rule, abrasive to rough up the brass tube and epoxy to glue the tube in the blank.
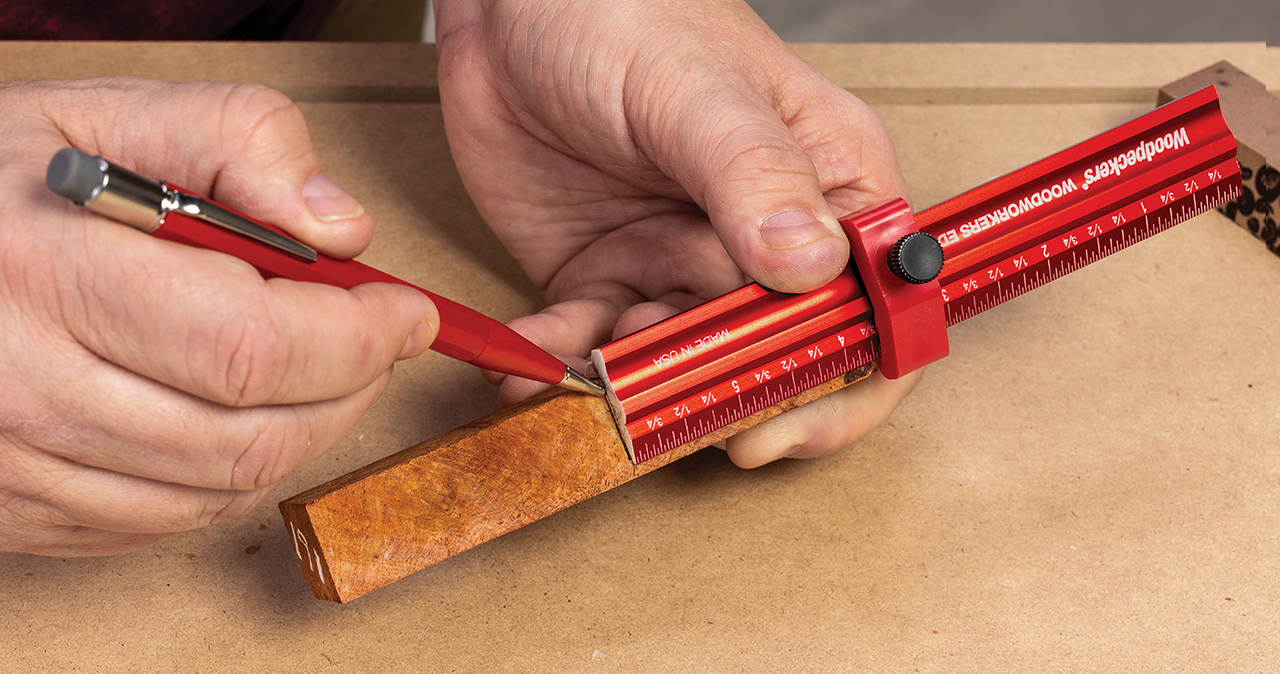
Woodpeckers Edge Rule with a stop is ideal for marking pen blanks to length. The stop makes sure every blank you’re doing is the same, and saves time, too.
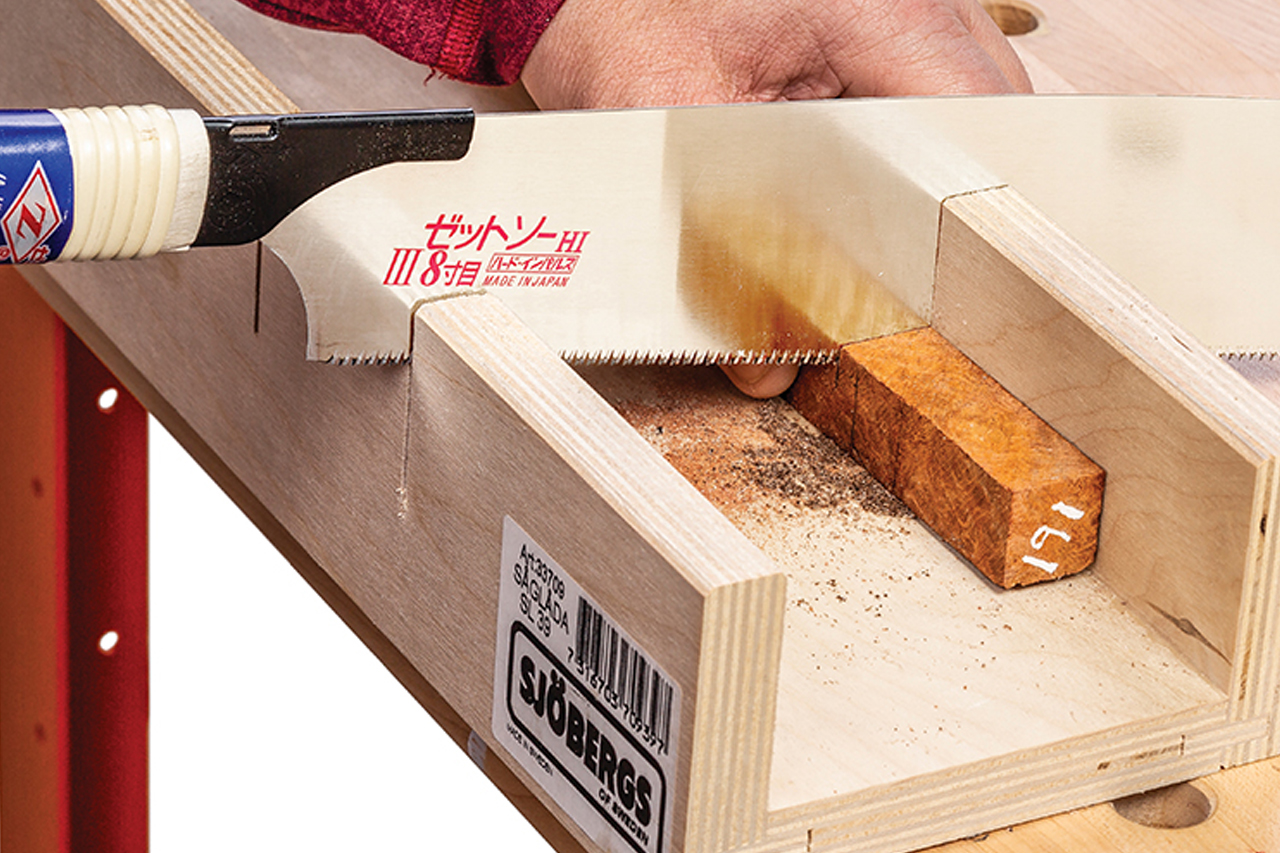
With just a few blanks to cut, using a hand saw and miter box for the job can be as fast as setting up power tools.
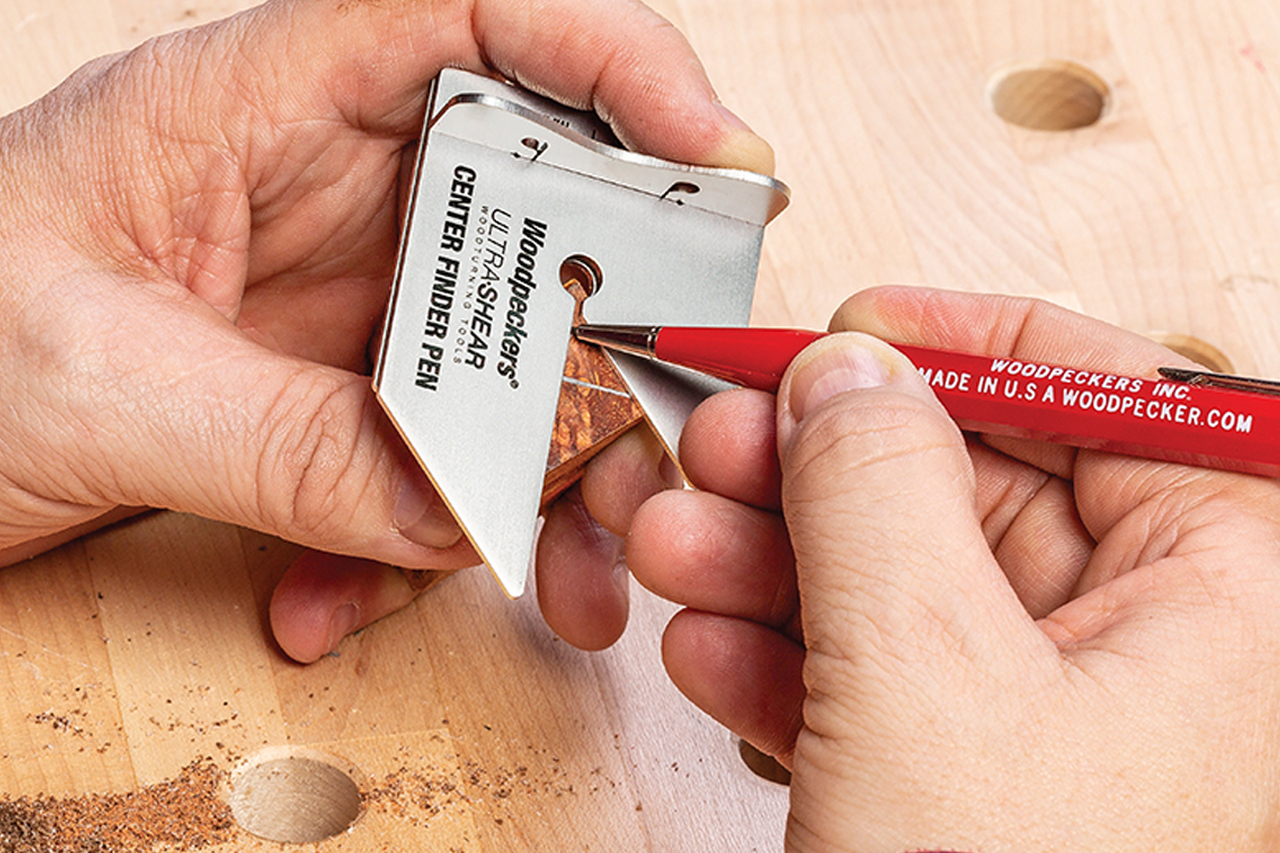
Woodpeckers 2” Center Finder quickly locates center on square or round blanks. Mark from every corner if the blank is somewhat out of square.
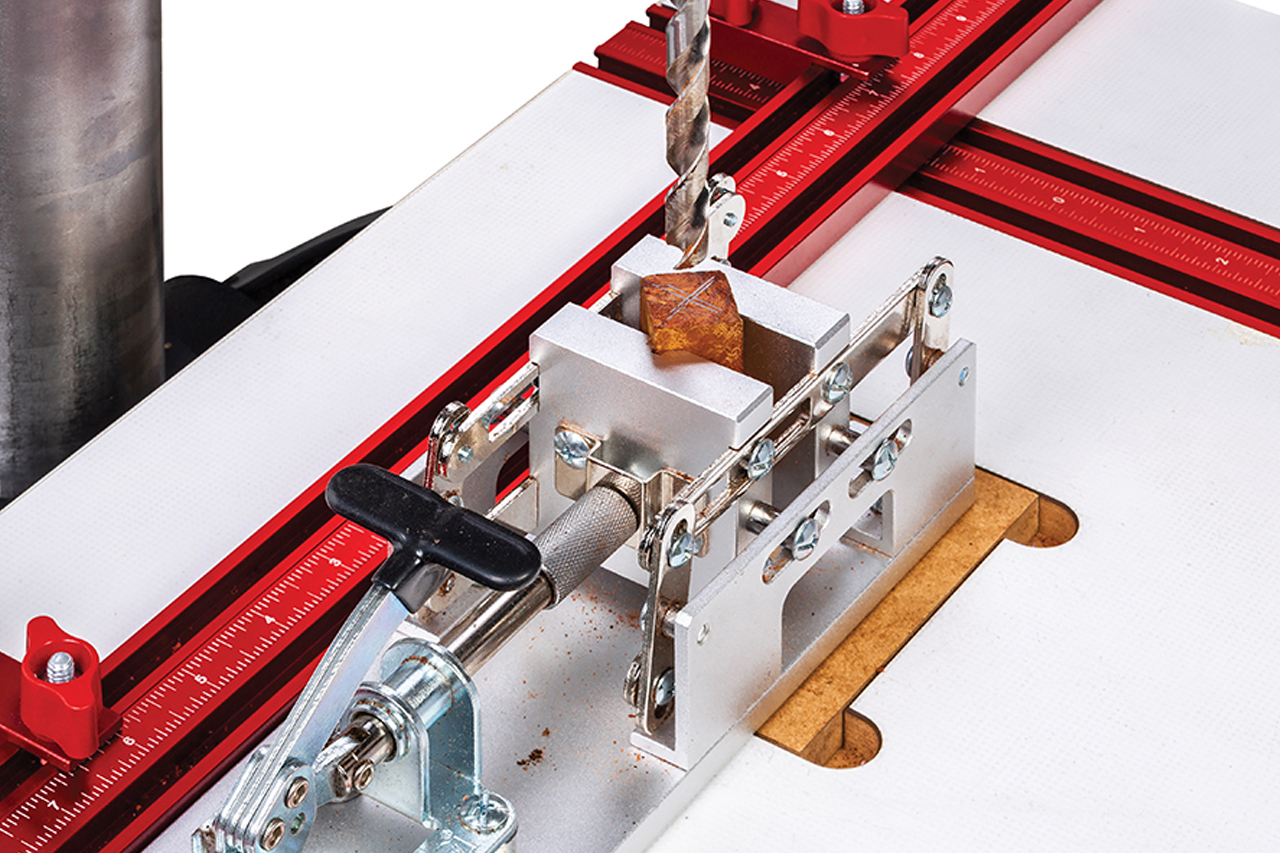
Use a sharp drill bit and a slow feed rate to make sure your hole is straight and centered.
Once it’s round, I start swinging a gentle arc from the center of the blank toward the ends, creating the slight bulge. The final wall thickness is quite thin, so I have plenty of room to play with the shape while I’m working my way down. When I am almost there, I roll the tool onto its side to about 45° and start shear scraping. This cut takes much less material per pass, but leaves a very clean finish.
Acrylics and resins don’t cut exactly the same as wood, so sometimes 45° isn’t the perfect shear-scraping angle. The round shaft of the Pen Size Tools lets me “tweak” the angle either a little steeper or a little flatter until I find the “sweet spot” that cuts the material just right.
I keep taking lighter and lighter cuts as I get the shape the way I want it and the ends of the blank are close to the diameter of the bushings. This is that other “technically challenging” step I mentioned earlier. I want the finished turned barrel to exactly match the bushings. I used to stop well away from the bushings and rely on sanding to get to final dimension. Now that I’m gaining confidence in my tool control, I do a lot more turning and a lot less sanding.
With the blank just a tiny bit above the bushing, I’m ready to switch to sanding. I take the tool rest out so I don’t risk getting pinched between it and the work. I work my way through a series of grits. I learned not to try and skip steps…it always shows up in the finished pen. I slow the lathe down to 1000 RPM or a little less and work with the lathe on for 30 seconds or so. I keep the abrasive moving. I’ve found it’s easy to burn acrylics if I hold the abrasive too long in one spot. After I have what appears to be a uniform surface, I turn the lathe off and sand along the grain by hand a few strokes all the way around the blank. That cuts down on radial tracks showing up in the finish later. I repeat the process working through the grits up to 600.
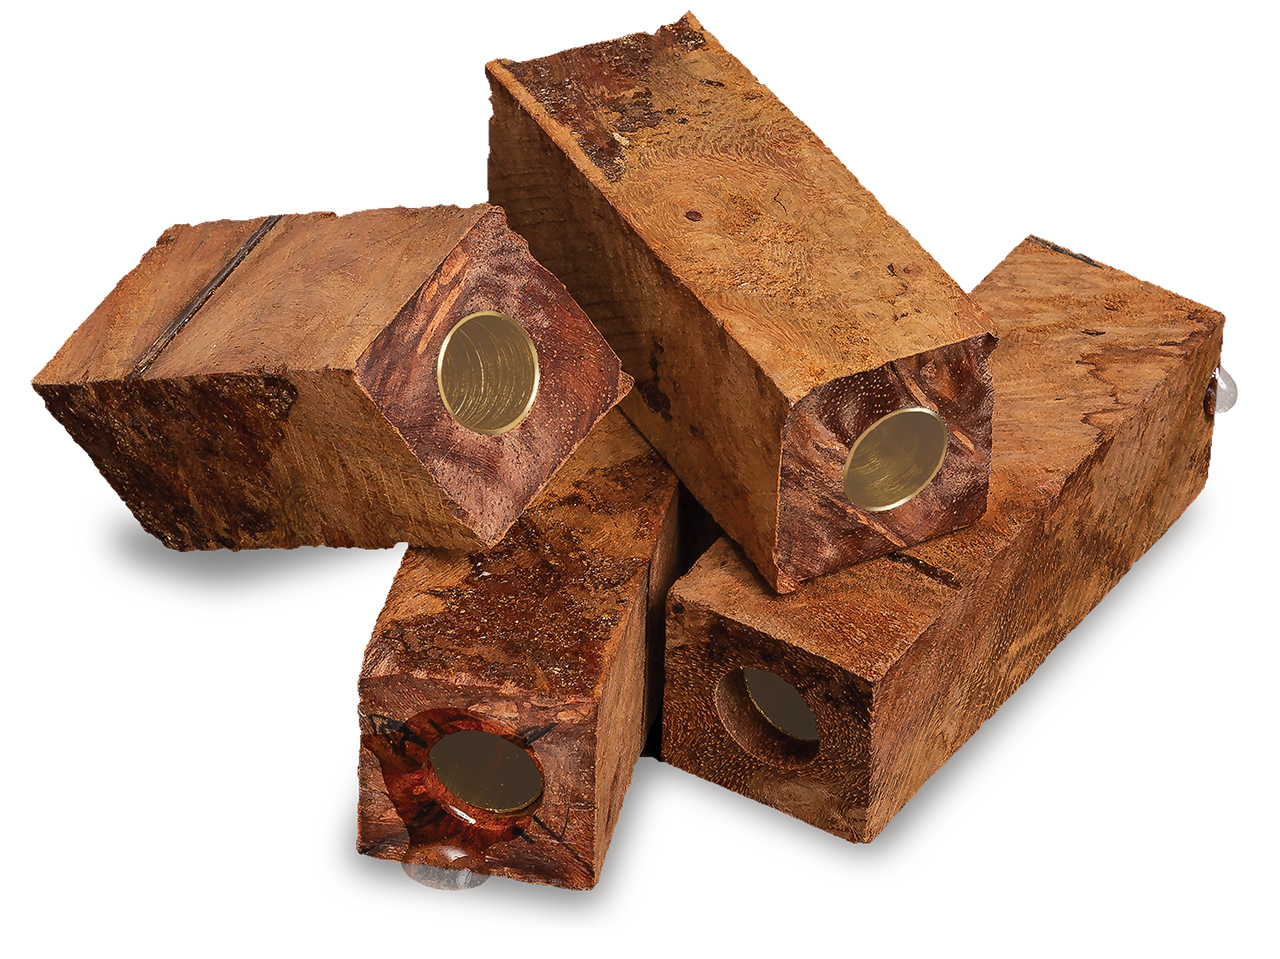
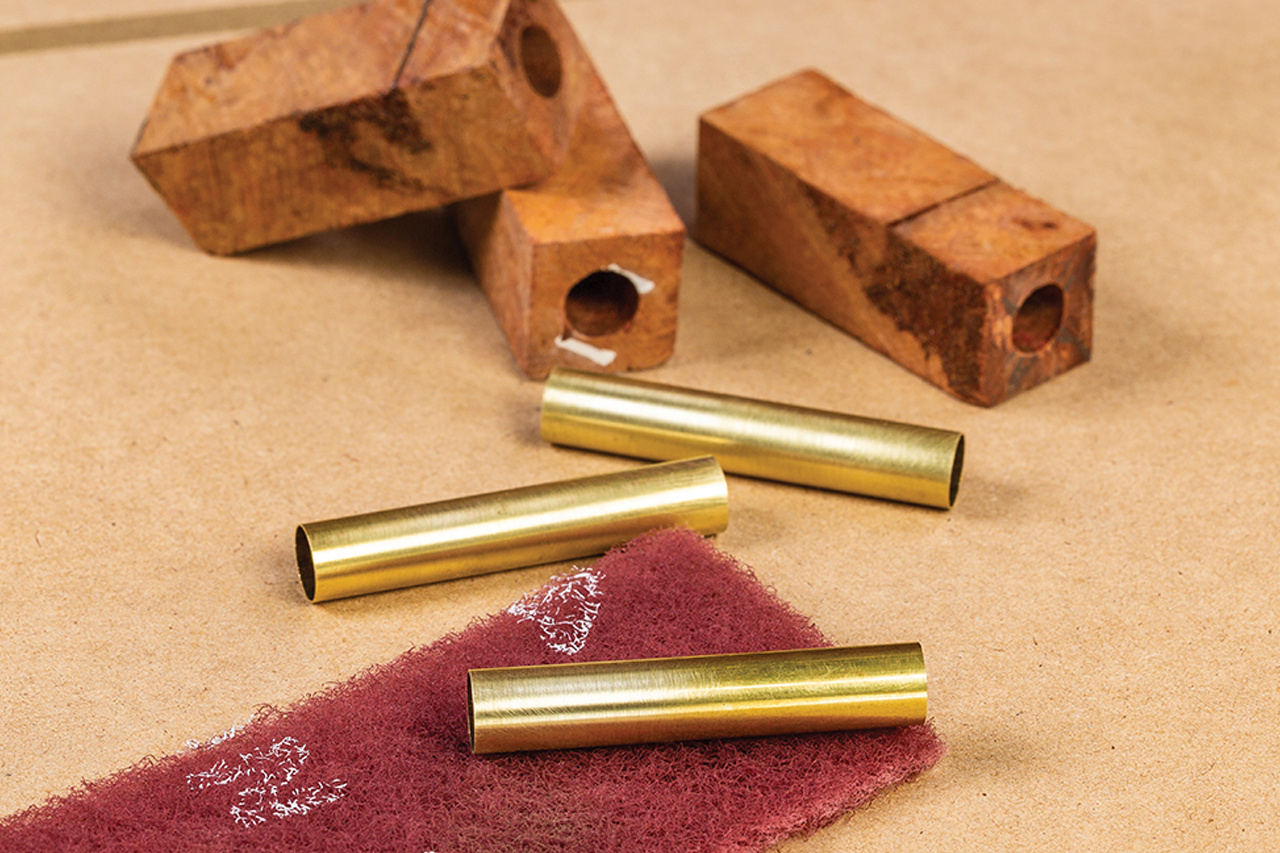
Rough up the outside of the brass insert tube with sandpaper or non-woven abrasive to improve adhesive grip.
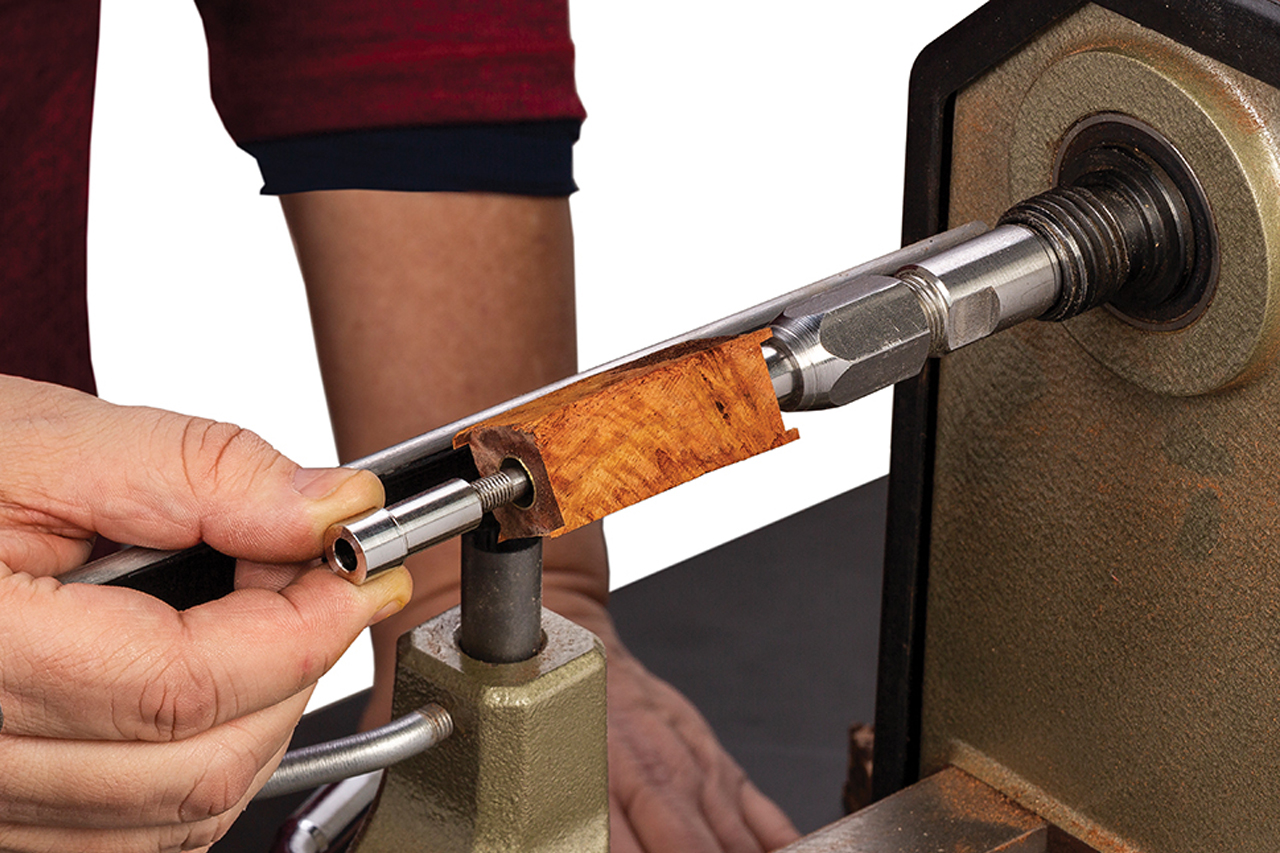
Pen turning requires a mandrel and bushings to mount the pen blank. Bushings fit inside brass tube. The outside diameter of the bushing is the "target" for finished diameter of the turning.
Since I was working with resin-infused wood and cast acrylic, I didn’t have to worry about applying a finish. After I went through the abrasive grits, I just kept on going with a series of wet-dry abrasive pads until the surface was highly polished.
The Wall Street II might be the easiest-to-assemble pen kit in the world. I don’t even use a pen press for it (though you can if you feel more comfortable). I slip the clip/end cap into the finished turned barrel, get it lined up correctly and press it most of the way in. When I get almost to the point of no return, I align the clip so that it covers any surface flaws that might have eluded my earlier inspections, then press it home. I always look at the end of the refill before I put the spring on and put it into the transmission. There’s a little protective cap on the end that can muck up everything if I don’t take it off. I slide the refill and transmission assembly into the nib, slide the barrel assembly on and I’m done.
All my graduating seniors are delighted with their pens. Guess it’s time to head to the store and see what sort of unique blank I can find for Father’s Day.
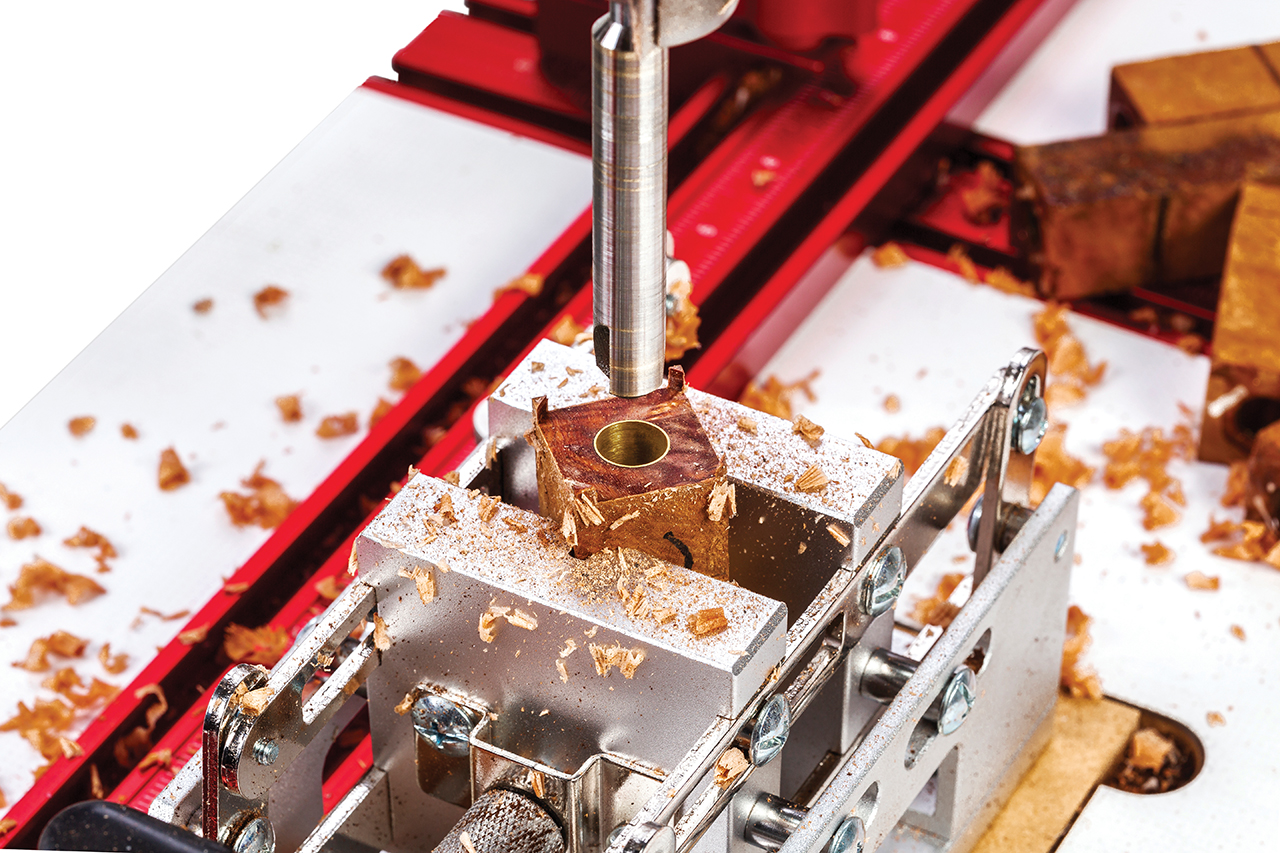
Carefully mill down the pen blank until it is flush with the brass insert. You’ll see the brass get bright and shiny when you just kiss it.
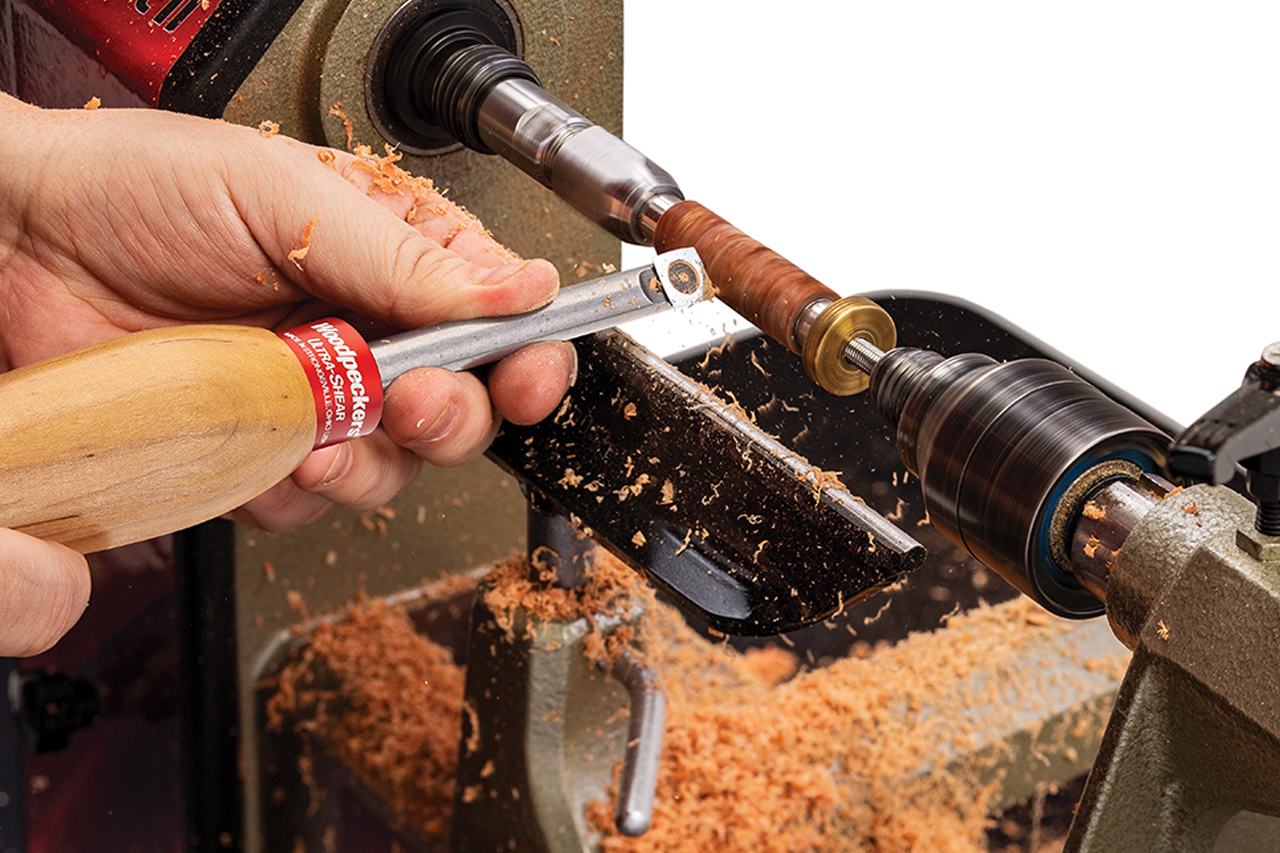
Roll the tool to about 45° for the final few passes. In acrylics and polymers, experiment with the shear angle to get optimum results.
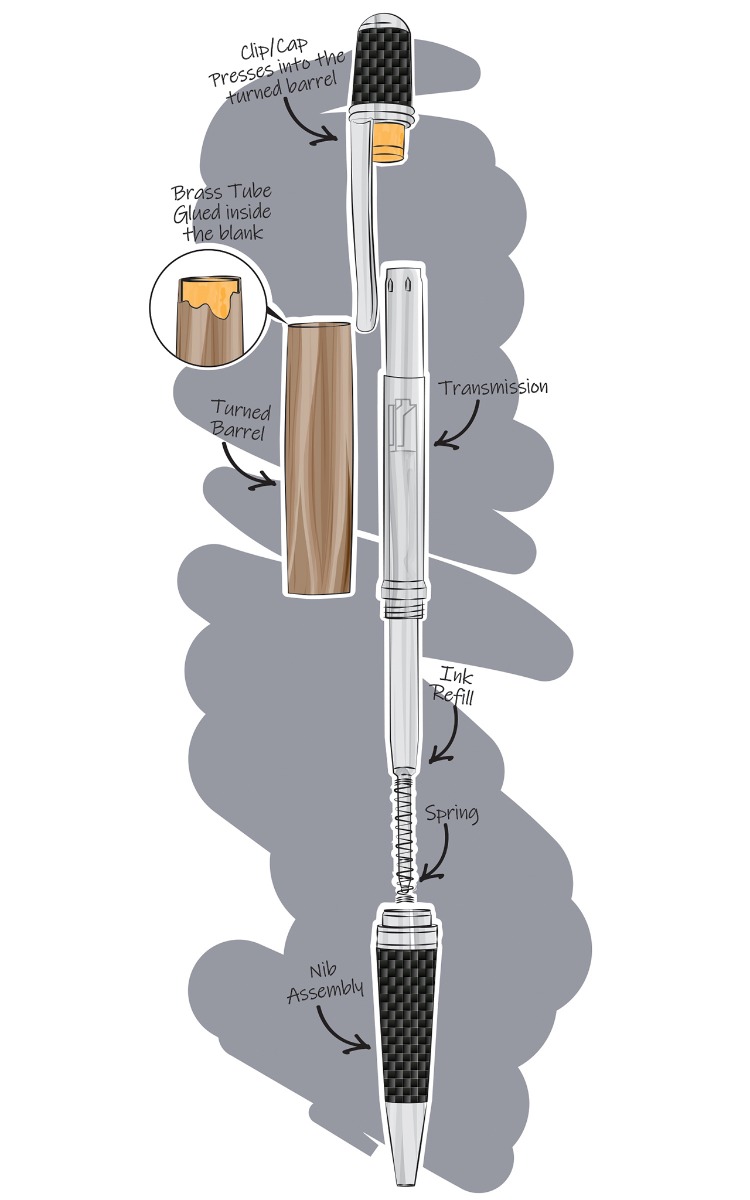
The Wall Street II doesn’t require a pen press for assembly. Download complete assembly instructions from your pen kit supplier.

