
Learn How to Make Perfect Curved or Square Shapes Using a Router
Pattern routing skills can substantially improve your woodworking in both creative and technical areas while improving the quality of your work. In this article you’ll learn how to choose router bits, make templates for both curved and square cornered shapes; and then how to make the cuts. You’ll be pleasantly surprised how easy pattern routing is once you understand the fundamentals.
![]()
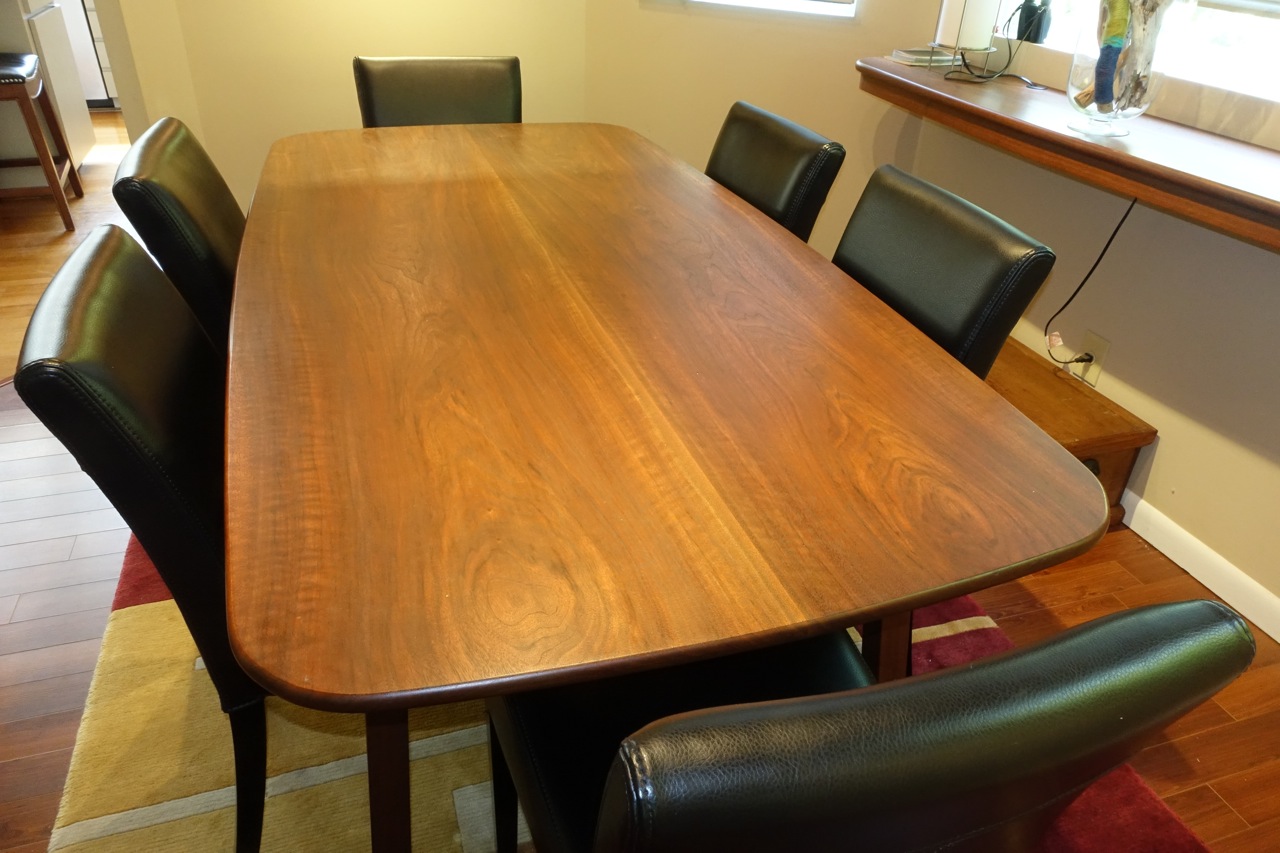
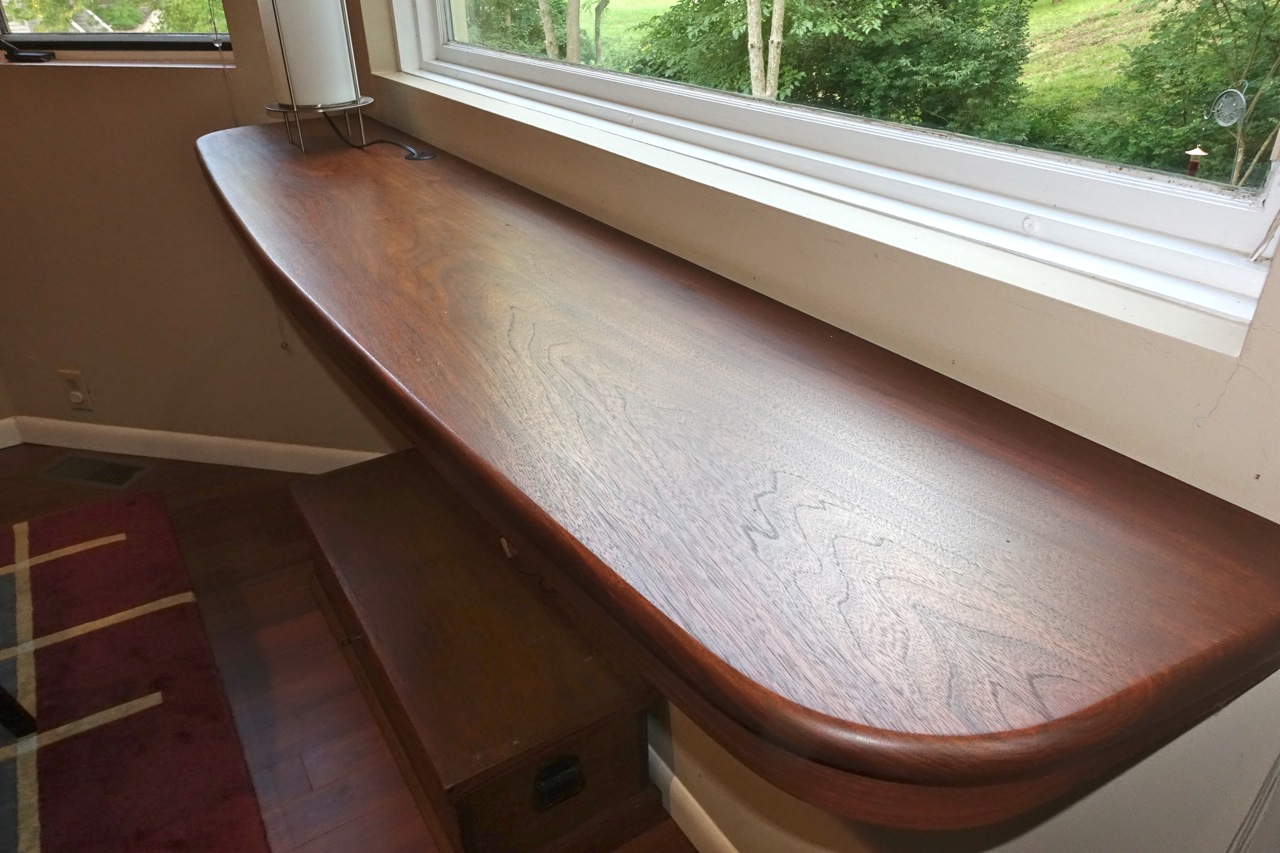
Here are some examples of pattern routing use in everyday woodworking. Use it to cut out holes in the backs of cabinets to access electrical outlets. Make numerous types of mortises like standard leaf hinges, regular mortises for joinery and double mortises for loose tenon joints, sliding dovetails; dadoes, rabbets and grooves. Use it for repetitive hole drilling. Pattern routing for curves can produce chair legs, fancy table aprons, table tops with radius corners and various radius edges. Use a curved template for making arched raised panel doors. The list could go on and on.

Your first consideration when pattern routing is how you intend your router to follow the template. You have two choices: use a straight router bit with a bearing of the same diameter mounted on the top or bottom (or both) of the bit; or, use straight bit with no bearing in combination with a guide busing mounted in the router base. The only real difference is how you make your template. With a bearing mounted bit you will make the template to the exact size and shape of the cut. The template for a router guide bushing set up requires a template to be sized to accommodate the offset of the dimension difference between the bushing outside diameter and router bit diameter. The calculation is straightforward:
OD of Bushing – router bit diameter ÷ 2. If the Busing OD is ⅝” and the router bit is ⅜ the difference is ¼ so the offset is ⅛”.
So if you wanted to make a template for an inside cut of a square cutout you’d simply make the template ¼” larger overall than the desired finished cut.
![]()
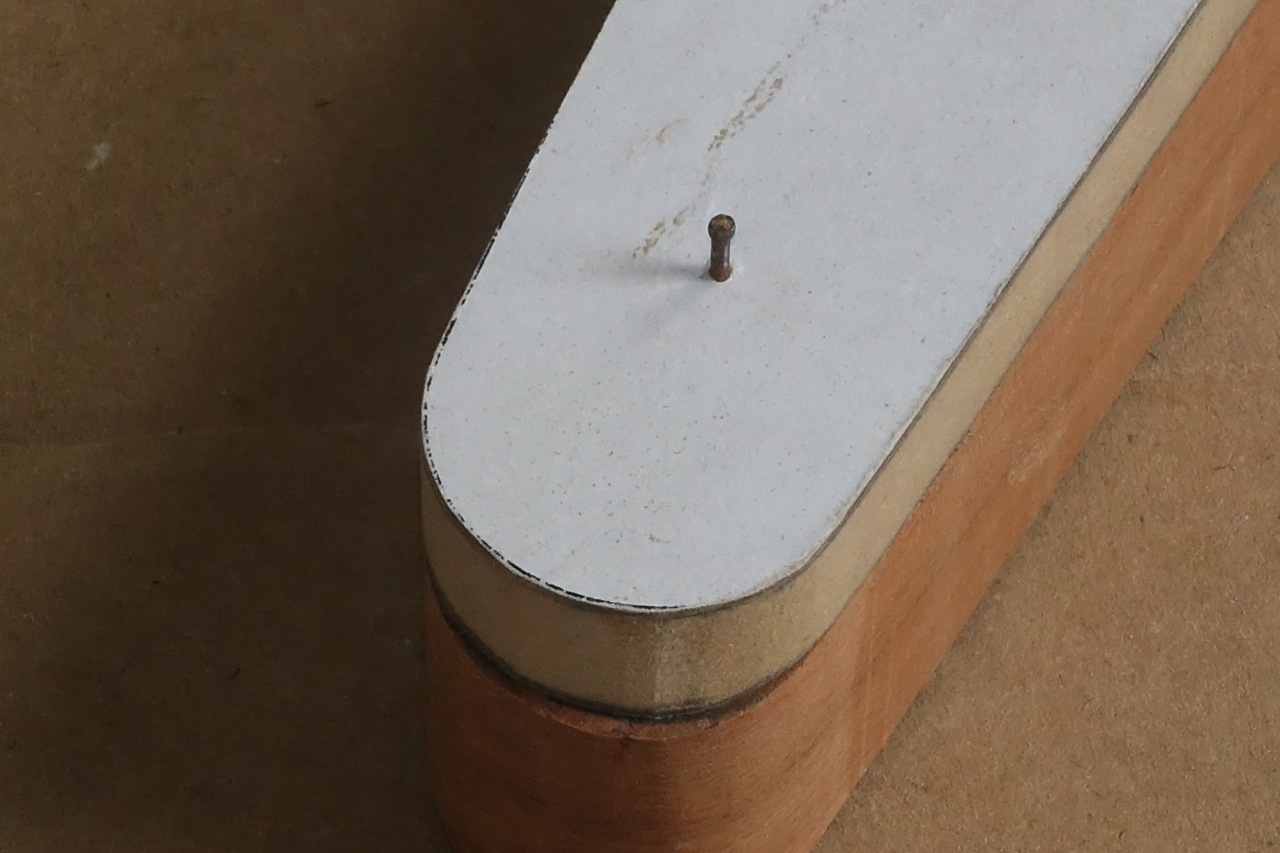
Template Making. Generally speaking, ½” thick plywood or Medium Density Fiberboard (MDF) is a good choice for template material. Regardless of size or shape of your cut the template must be sufficiently larger to support the router base and provide places to clamp or nail the template in place. If you nail your template to your work you can often nail to the back or underside side the work. Small brads, like 1¼” long 4d are sufficient and leave only a tiny blemish.
Make templates for square-cornered cuts by gluing together four correctly sized parts. Just take care the parts are carefully positioned during clamping. You’ll have two parts for the sides and two parts for the ends representing with width of your desired template opening.
Templates for curved shapes are more complicated. First, you’ll need to draw the curved line. Depending on the size you require you can use the “flexible stick and three nails” method. Prepare thin stock that will provide a consistent bend along the length. Often material that’s quarter sawn (straight grain) works well. Drive two nails near the length of curve location and a third nail mid-way between at the extremity of your arc. Place your stick against one end nail, then on the opposite side of the middle nail and then on the other end nail. The stick should stay in position without being held. If you have a smooth or fair curve, draw a dark pencil line along the curved stick.
Next, carefully cut to the the line using a jig saw or bandsaw. Error on cutting a bit fat of the line but cut as close as possible leaving no more than 1/16”. When done, sand the edge smooth and remove any high spots. It’s best to use a belt/disc sander if you have one. Take care to keep your template edge as square to the face as possible.
Make the Square Cut. In most cases square cornered cuts will be inside cuts. First, carefully position your template on the work and secure it with clamps or brad nails. (make sure your work is elevated off your work surface because the router bit will pass completely through the work.) If you are not using a plunge router drill a hole in the work piece that’s larger than the bit diameter. This will eliminate the need to plunge the bit into the work.
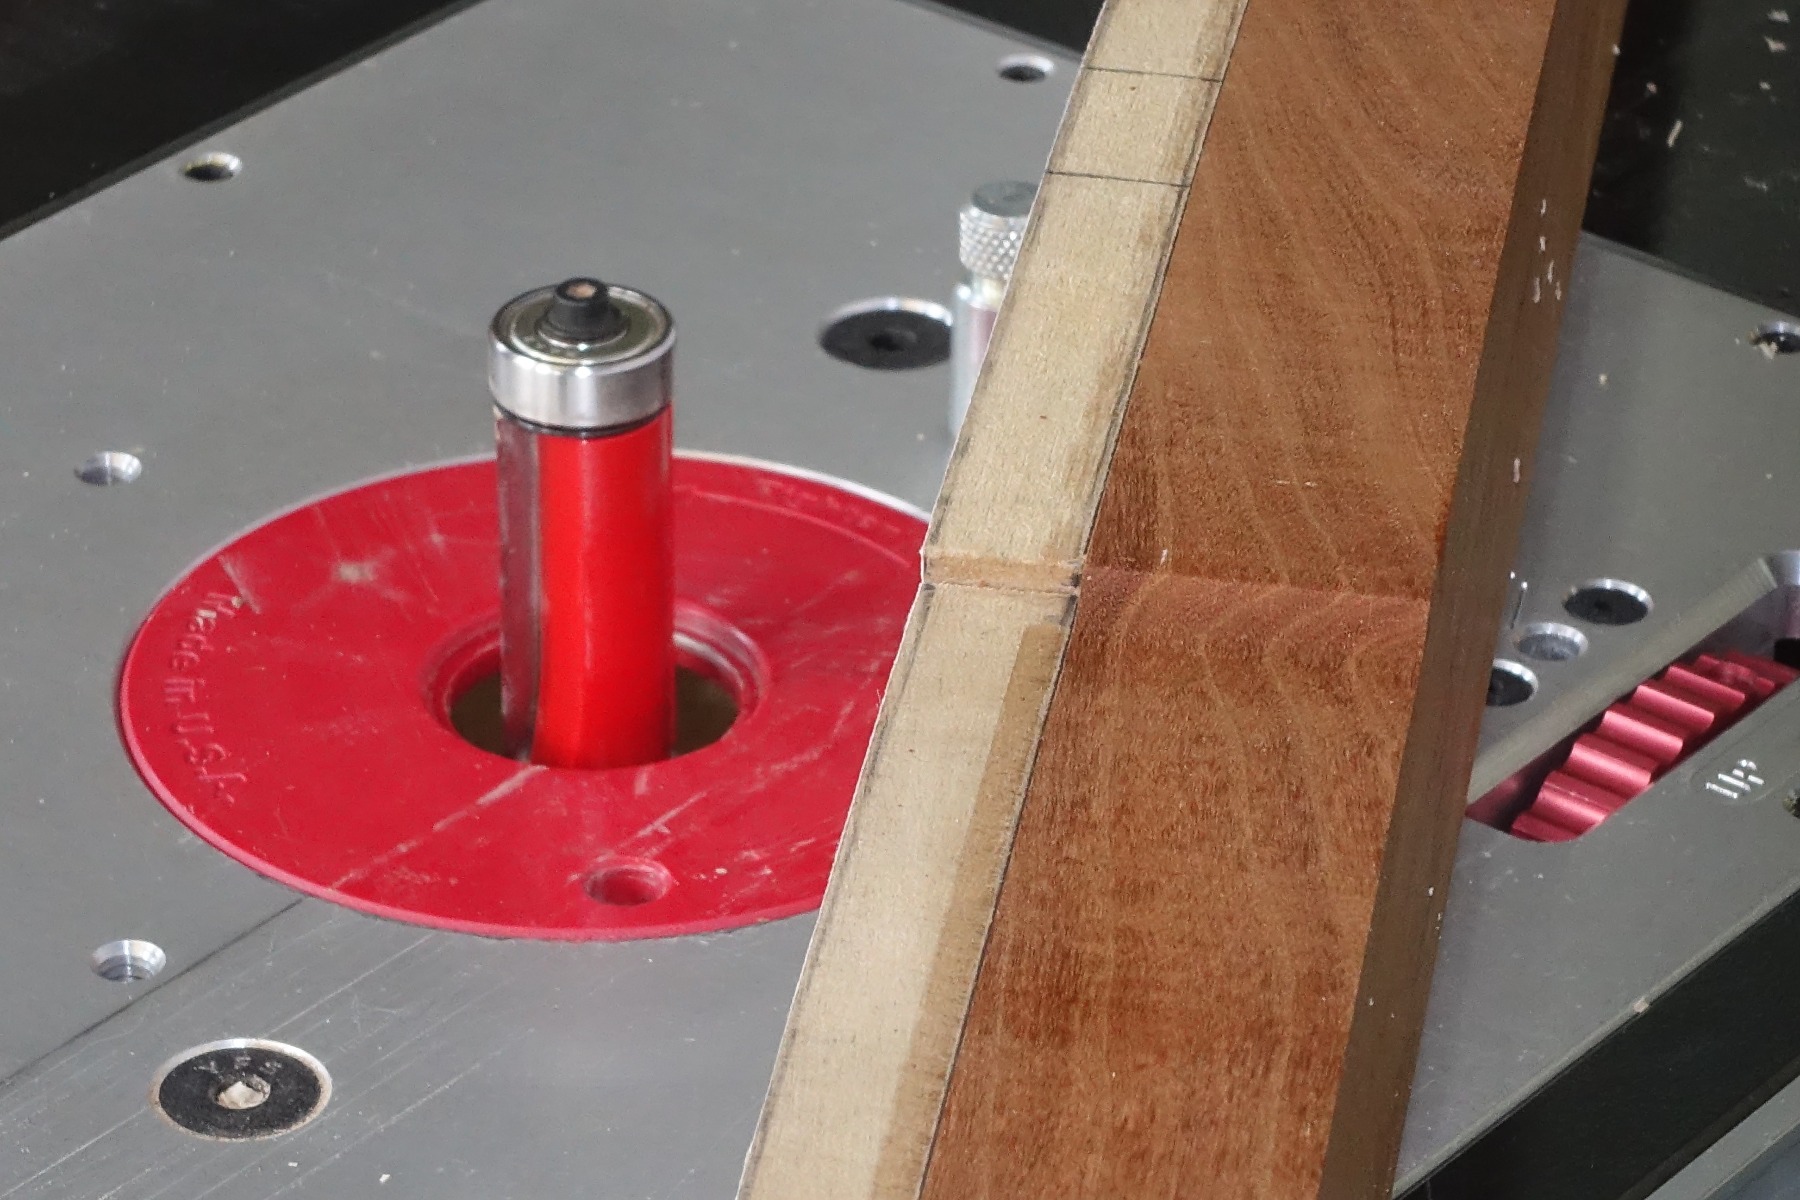
You should use a bit that’s not more than ½” diameter and the bearing should be located above the cutting blades. Make sure the depth of cut allows the bearing to contact the template edge. If you are using a guide bushing setup, you can easily set the depth of cut to make a couple passes which is preferable to cutting the full thickness in one pass. Now set the bit in the hole then start the router. Move toward the template edge holding the router firmly until contact is made. Route in a clockwise direction while maintaining contact with the template edge. When done, clear out any debris build-up as it will interfere with the bearing or bushing contacting the template edge. Adjust the router depth setting and repeat the process for a second pass to cut fully through the work.
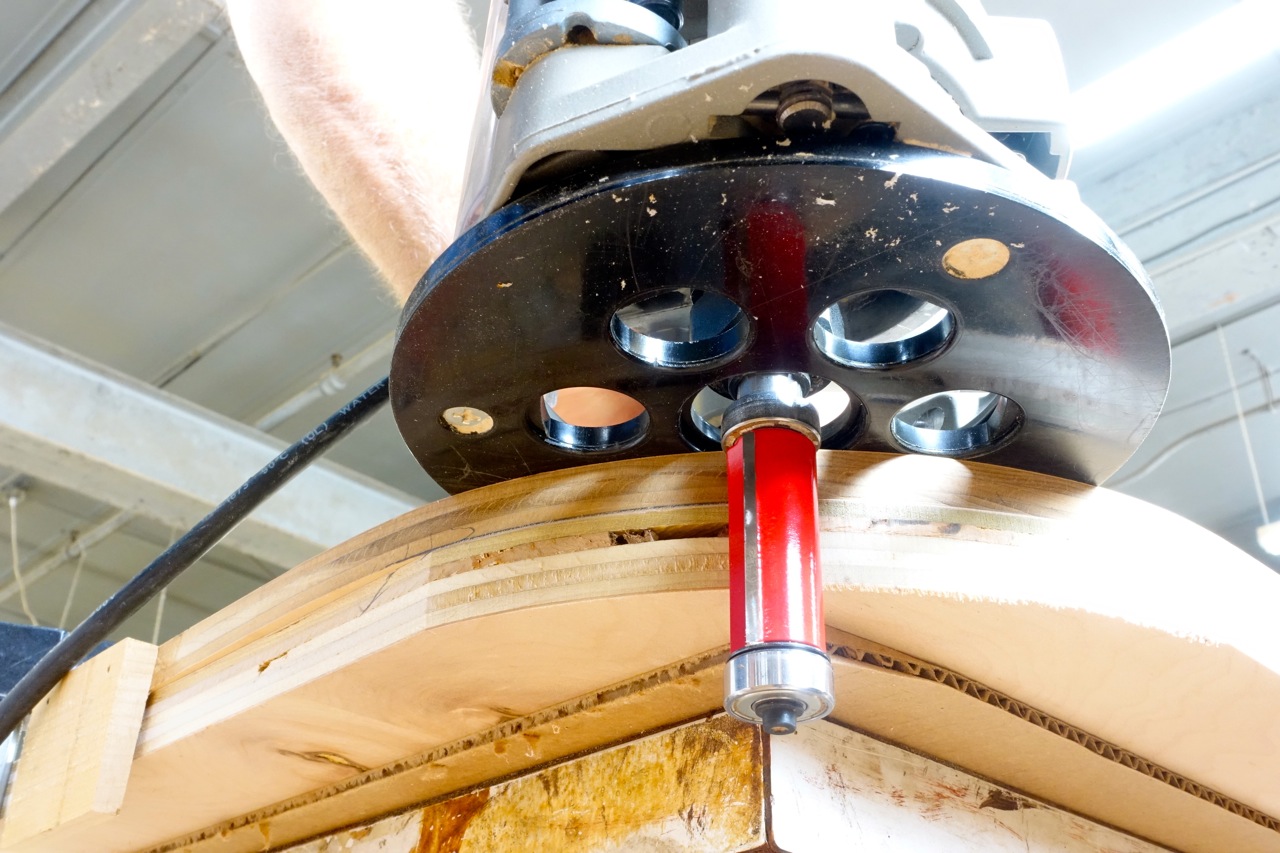
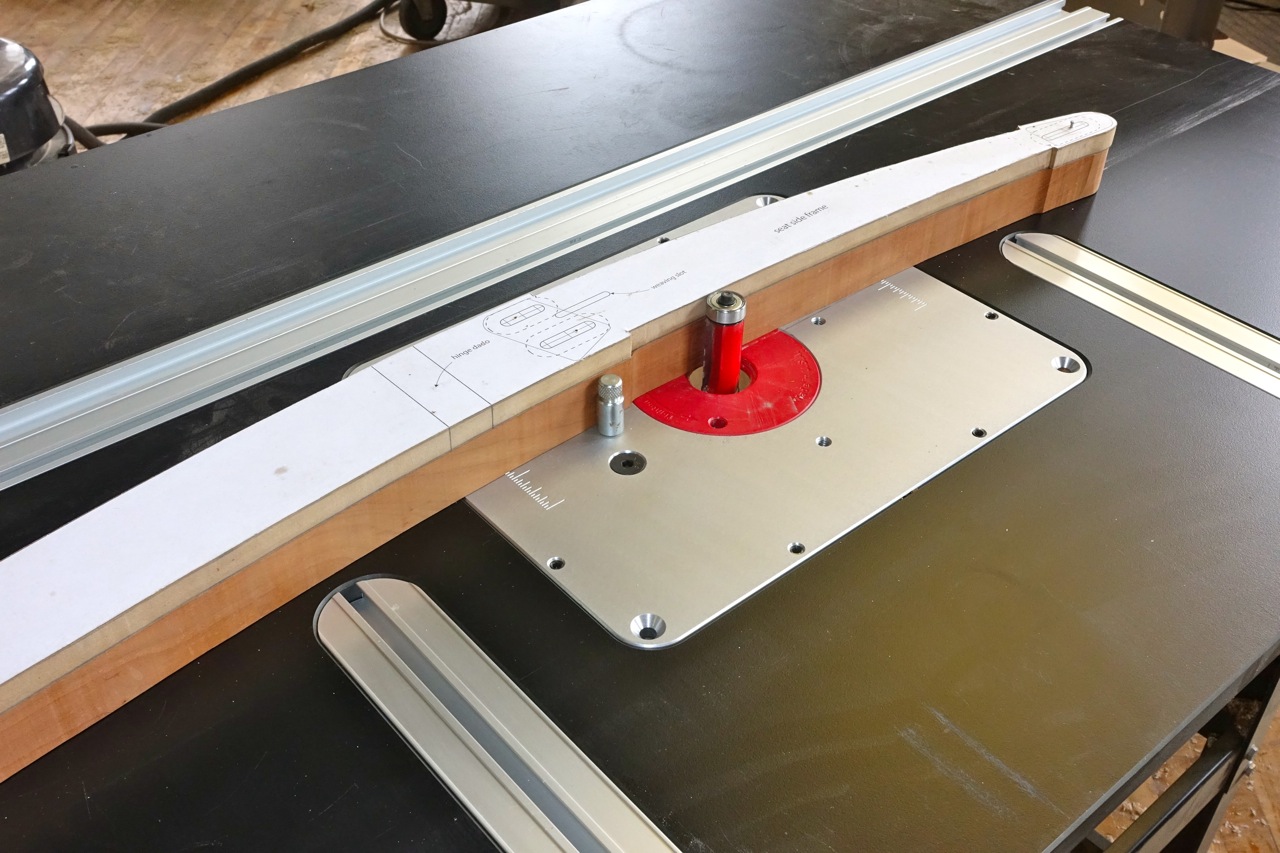

Make the Curved Cut. Curved cuts are most often outside cuts. You’ll want to use your router table for smaller parts that are more easily handled. Bigger pieces, like table tops, are done on a workbench using a hand-held router.
In most cases it’s best to use a router bit with a bearing attached. At the router table a top mounted bearing (top of the bit when protruding through the table) is a good choice. Choose a bottom mounted bearing when routing by hand. In each of these situations the template will be mounted on top of the work.
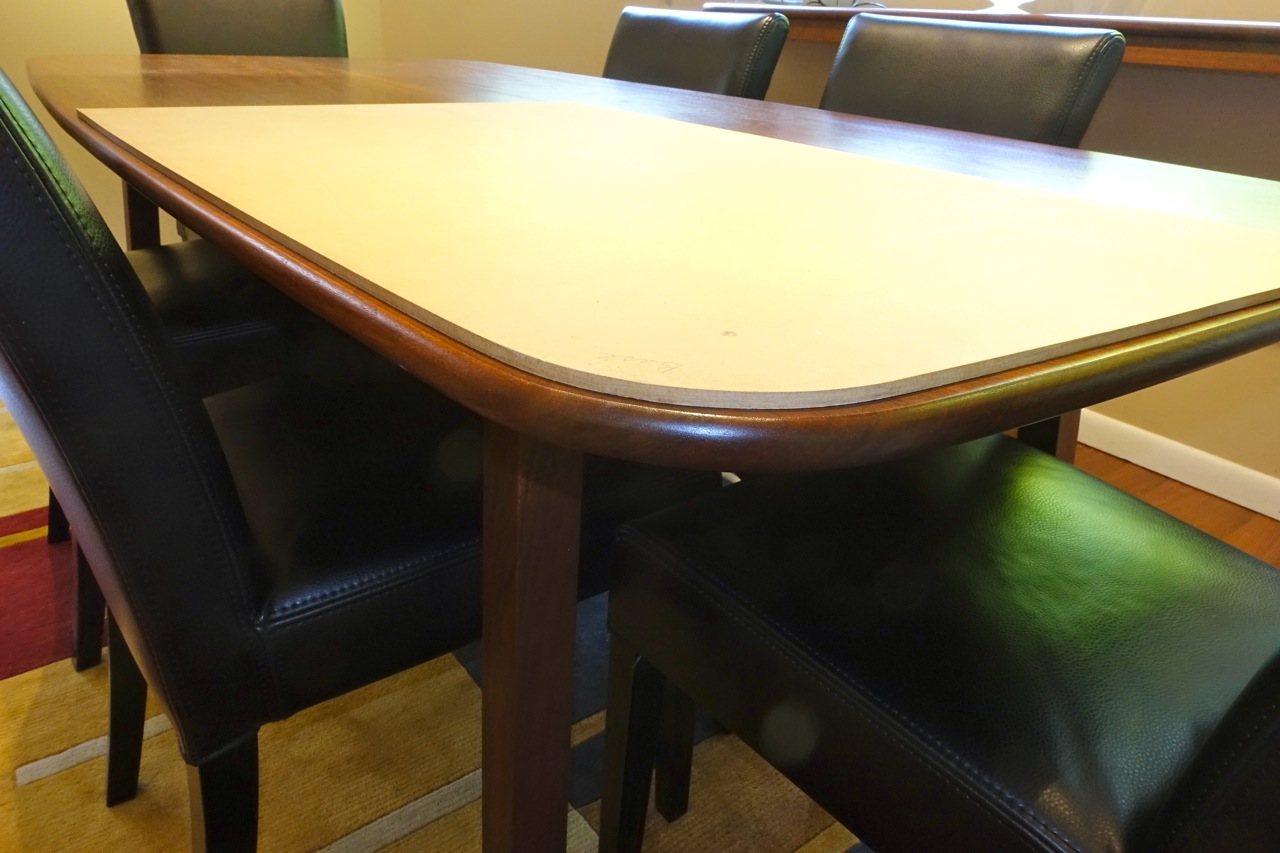
To prepare the your stock for routing, trace the shape on the work with a pencil. And just like making the template cut just outside the line by about 1/16” to 1/8” using a jigsaw or bandsaw. Next, mount the template on top of the work and secure with clamps or nails. In some cases, a quality double-sided tape can be used. At the router table use a starter pin if you can to ease the part into the cut. In hand held routing simply start by moving the router until the bearing contacts the template edge. If you’ve rough cut to the line you can usually trim to final shape in one pass.
When routing solid stock, like a chair leg, don’t route the end grain at the narrow ends of the piece. There’s a strong likelihood the grain will tear out (or even split apart). Instead, take the safe option and power sand the ends to your pencil line.
Pattern routing applications are only limited by your imagination. Add this skill to your woodworking and you’ll vastly expand the variety, quality and precision to your projects.
About the Author: Steve Shanesy was editor and publisher of Popular Woodworking magazine for 19 years. Prior to that he spent 15 years working in and managing high-end furniture and cabinet shops in Los Angeles and Cincinnati.
For pattern routing projects, Woodpeckers features router tools like routers, router tables and many versatile router accessories for your pattern-routing enjoyment and success. Thank you for reading!