
Photos by Nick Cook & Cathy Wicke-Cook
nickcookwoodturner.com
A bit of history...I started making wine stoppers in 1988 and since that time, I have made more than one quarter million. I managed to pay my mortgage for more than fifteen years by turning these little guys. Not really sure why anyone needs a wine stopper because when I open a bottle of wine, I do my best to finish it.
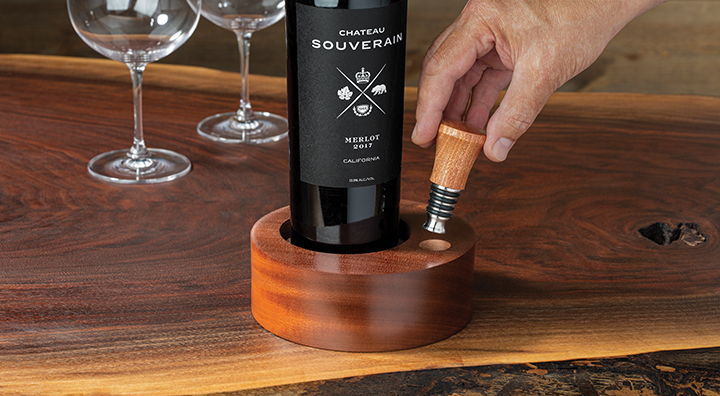
A natural addition to my line of gift items was a wine coaster. I made a variety of simple round coasters and they sold, but I wanted something a little more unique. It evolved into what I will show you here, a coaster with a place for your wine stopper.
The vacuum chuck. I have been working with vacuum chucks for many years, in fact, I wrote the first article on using vacuum chucks on the lathe in 1992. At that time, it was not very common so I had to work it out on my own. My first vacuum source was a recovered refrigerator compressor and the connection to the lathe was a Dublin value (a valve to control the flow of hydraulic fluid in oil drilling rigs). It worked and managed to make a lot of coasters before updating to what is currently available.
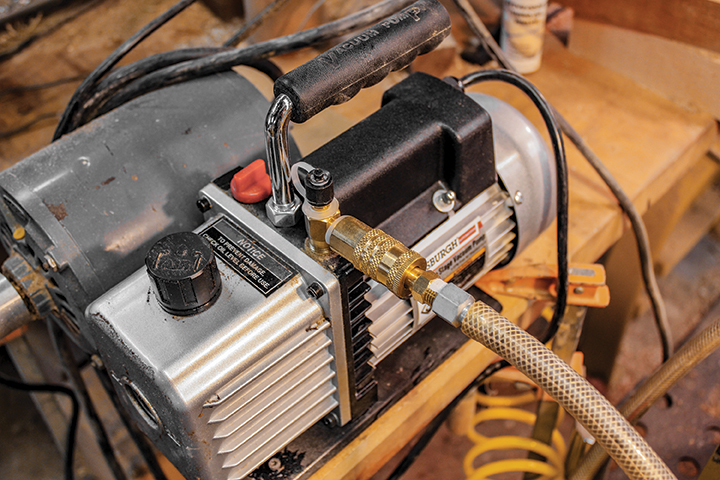
1 & 2 This is a perfect project for vacuum chucking. You can either purchase a vacuum pump or an attachment for your air compressor called a “venturi”. The venturi is less expensive but it will make your compressor run constantly. You will also need a rotary valve. This is the part that caused problems in the early days of vacuum chucking. You need something that will spin with the lathe shaft, provide airflow, and not spin on the other side of the headstock. Nowadays there are several on the market in a broad range of prices. Three companies that make them are TMI, OneWay and JT Turning Tools. They all work, just choose the one that fits your shop and your budget best.

3 You will need to make a special-purpose chuck just for this project. It’s not as daunting as it sounds, you just need a faceplate and a blank of hardwood, I chose soft maple 1-1/2" to 2" thick and 10" to 12" in diameter. Use a compass to draw a circle as large as possible on the blank and cut it on the bandsaw. Draw a line through the center, and make a second mark along the same line, 1/2" away from the center. Use a compass to draw two circles on the blank the size of your faceplate. I use a 6" faceplate so I drew two 6" circles, one at the true center and the second 1/2" offset from the first.
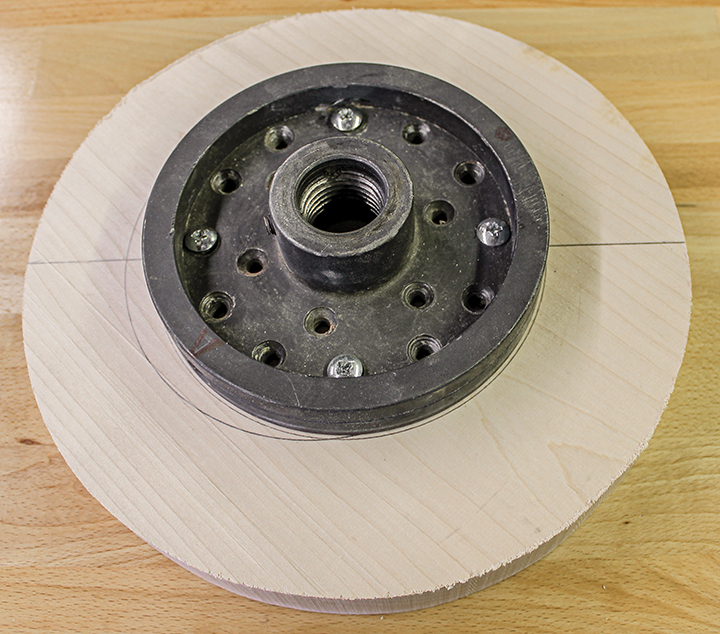
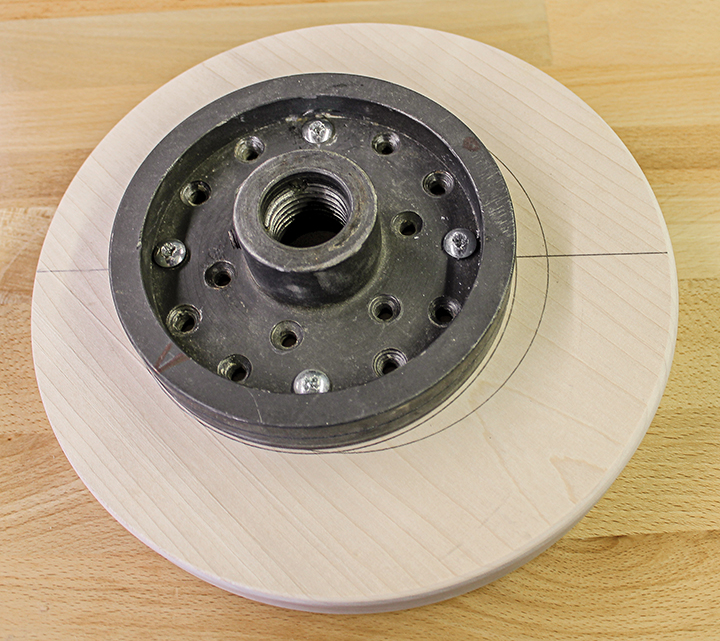
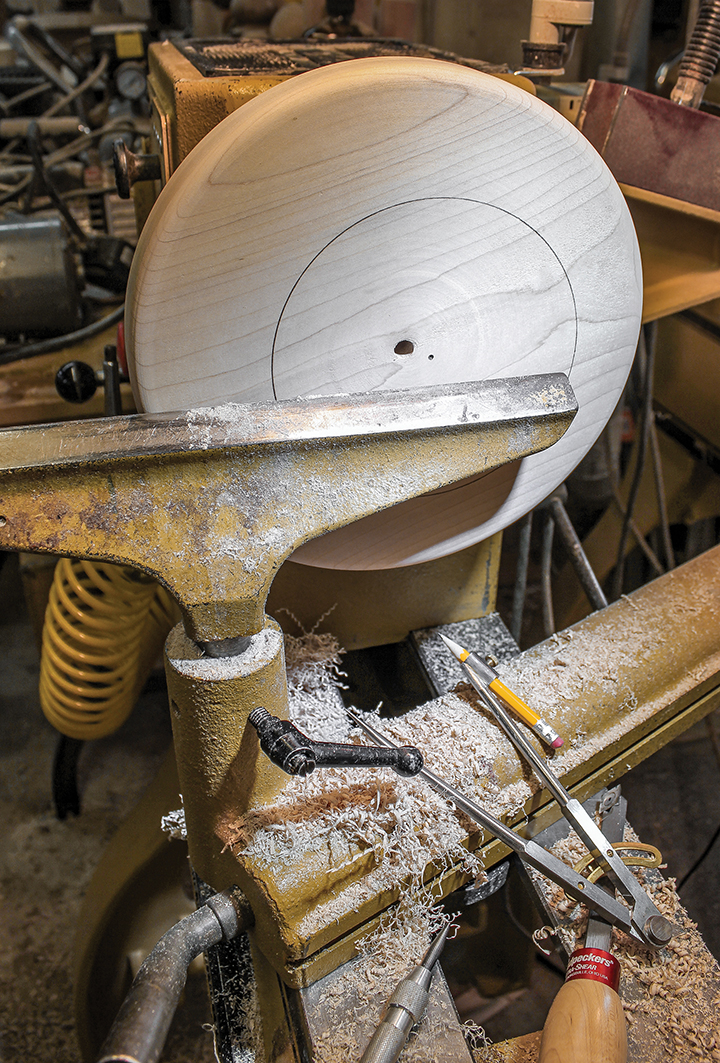
4, 5 & 6 Drill a hole completely through the blank at the true center. Size isn’t important…1/2" to 3/4" should work fine. Screw the faceplate to the blank on the true center. Mount it on the lathe, true it up and round over the corners to avoid sharp edges. Remove it from the lathe and remove the faceplate, then remount the faceplate on the offset center you marked out earlier. Put the faceplate back on the lathe. Turn the speed up slowly as the blank is off center and will vibrate if it turned on at higher rpms. Once the piece is spinning, locate and mark the new center. Turn the lathe off and use a compass to mark a 6" circle on the blank. This will be the recess that the coaster will fit into while you’re cutting the offset base for the wine bottle, so cut it carefully.
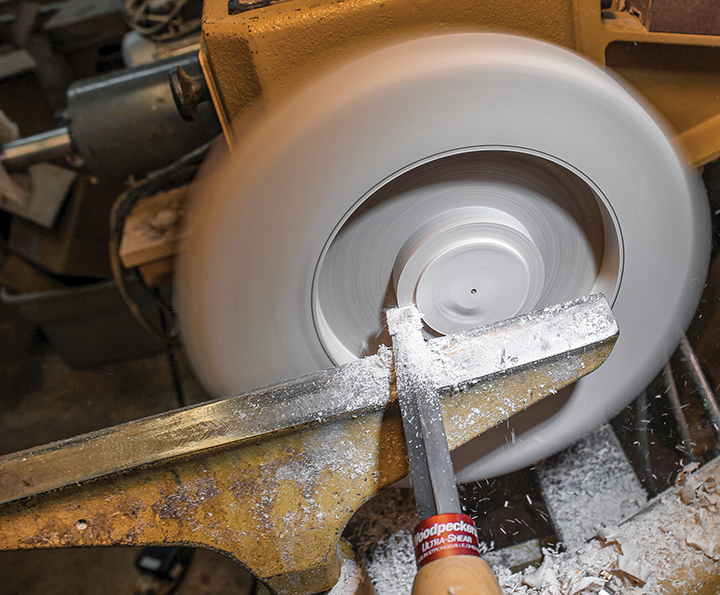
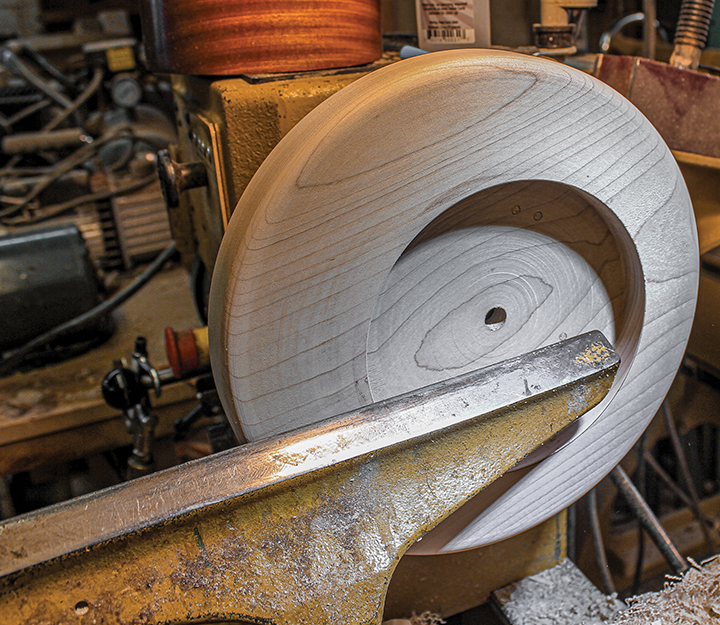
7 & 8 I use a parting tool to establish the perimeter, then use the Ultra-Shear Square carbide tool to remove the rest of the material. It’s fast and very efficient and leaves crisp clean edges. I use the Woodpeckers Ultra-Shear Round to make the middle section slightly concave, leaving a flat approximately 1” wide around the perimeter.
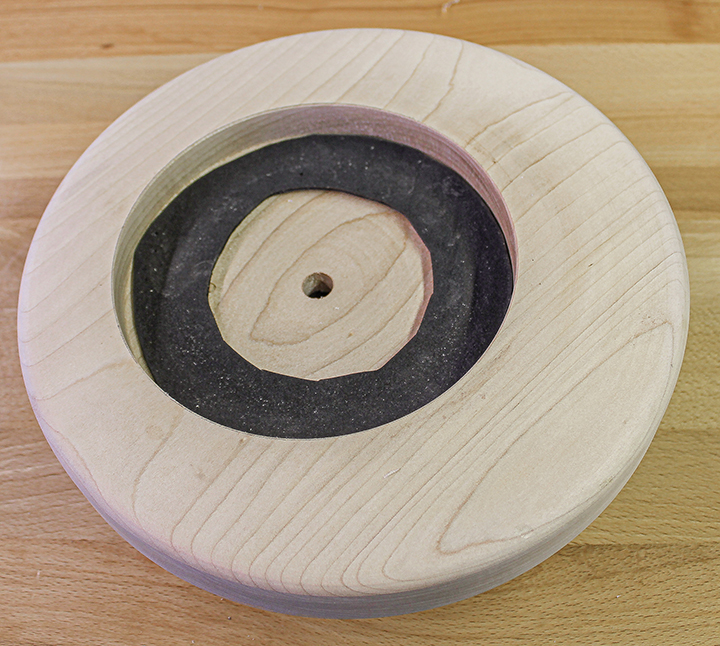
9 For the seal I use sheet foam rubber available in the crafts section at most art supply stores (even Walmart’s craft section). I cut a donut shaped piece just under 6" in diameter and about 1" wide. Rubber cement works well to adhere it to the recess. Remove the faceplate and return it to the true center. It is now ready to use.
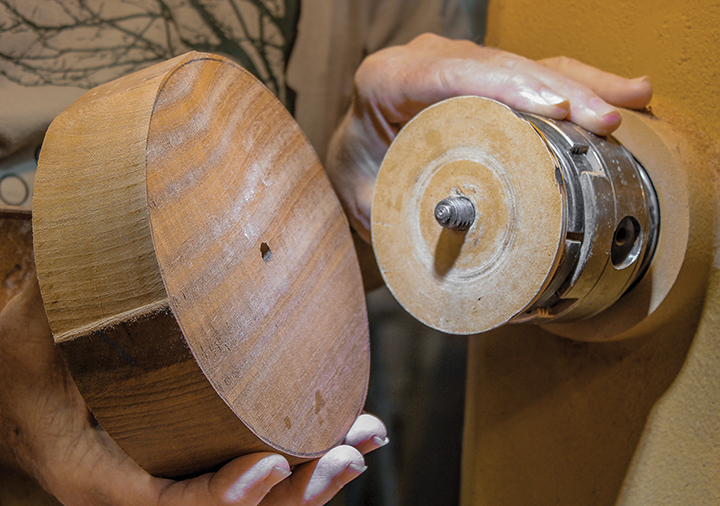
10 Coaster Material - I have used a variety of materials for my coasters, maple, ash, cherry, walnut, canary wood and sapele, they all work. My current favorite is sapele. I use 8/4 stock and cut circles about 6-1/4" in diameter. I use a screw center that requires a 3/8" hole, I drill the center of what will become the top surface of the coaster.

11 I start by truing up the bottom surface and sizing the blank to exactly 6" diameter. I leave about a 3/4" flat surface around the perimeter and create a slight (1/8") recess to ensure the finished coaster will sit flat on any surface.
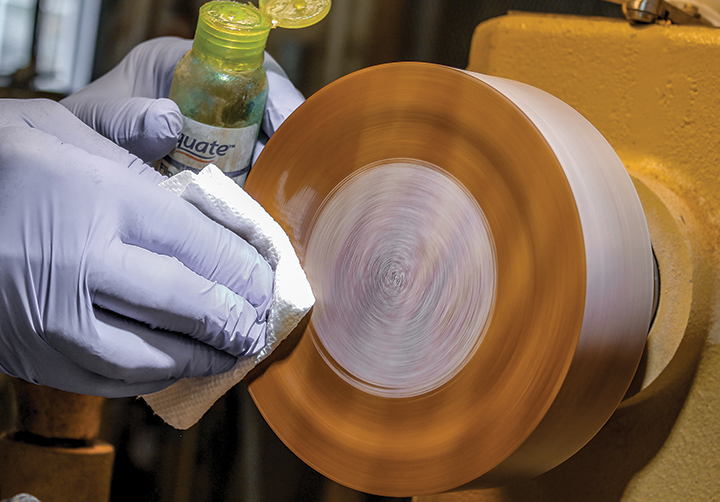
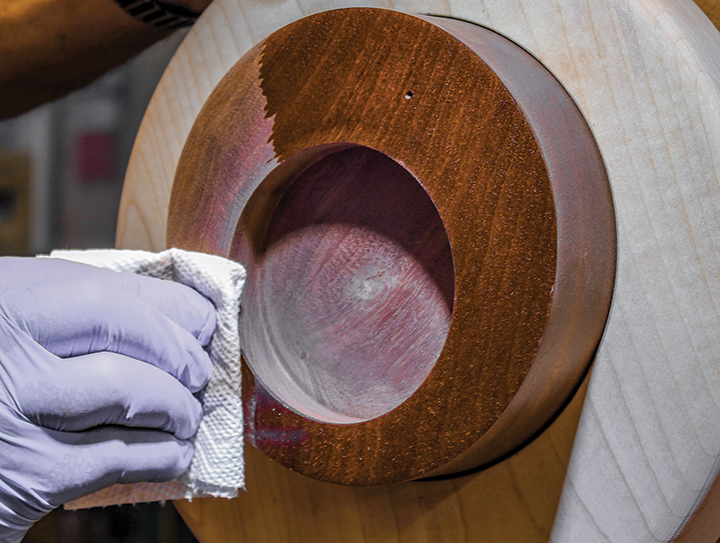
12 While it is still attached to the screw center, I sand and finish both surfaces. I start with 180 grit and power sand through 220, 320 and 400 grits. My finish of choice is Min-Wax Wipe-on Poly. I usually apply four coats, sanding between coats with increasing finer grits. The Wipe-on Poly has proved to be a very hard and durable finish. My final step is to apply Briwax with 0000 steel wood to remove any dust or streaks and buff to a high sheen.
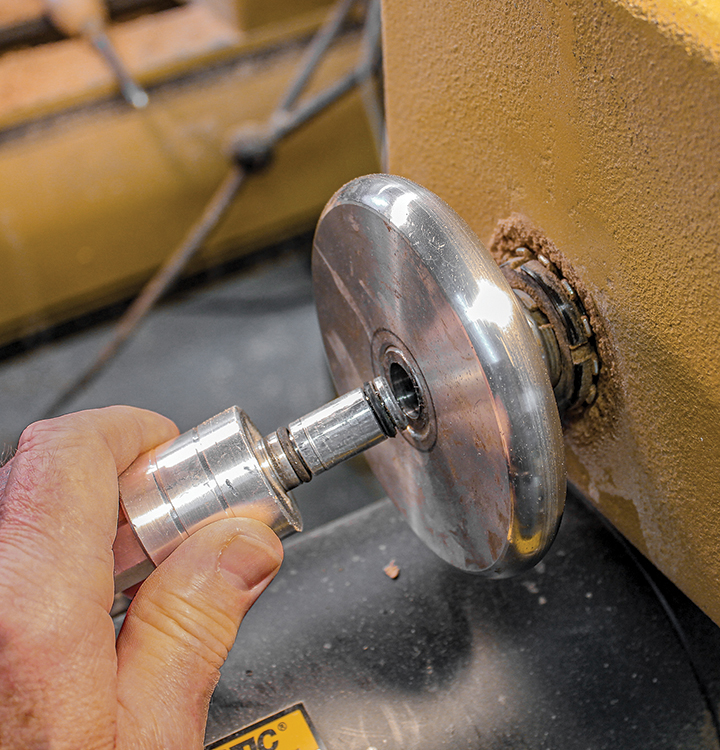
13 Turning the Face - I use the JT Turning Tools adapter to connect the vacuum source to the lathe. Once in place, I attach the custom chuck to the spindle and it is ready to go. With the coaster blank in place I turn the vacuum pump on to secure it in the chuck.
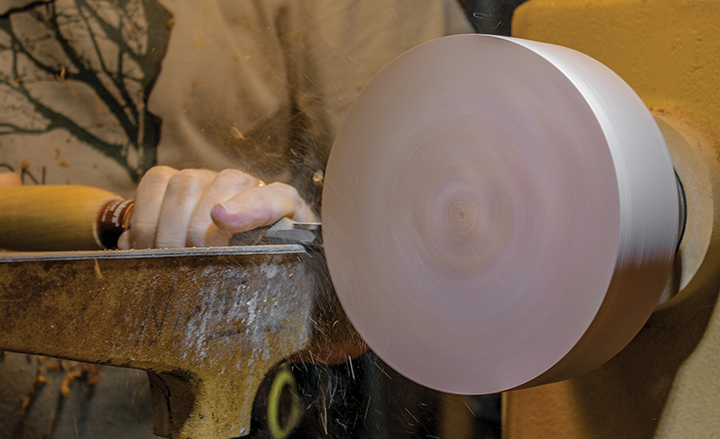
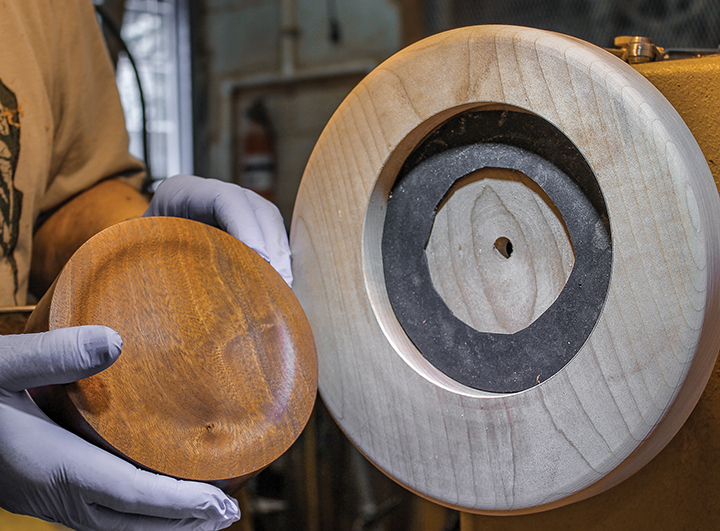
14 & 15 Turning the lathe on slowly, I mark the new center on the coaster. Using a center finder, I draw a line through the two centers, this will allow me to locate the widest point for placement of the wine stopper. I use a compass to draw a 3-1/2” circle on the face. I use a parting tool to outline the recess and set the depth (approximately 3/4" deep). The Woodpeckers Ultra-Shear Square scraper is used to remove the rest of the material. Next I sand and finish as I did on the previous side.
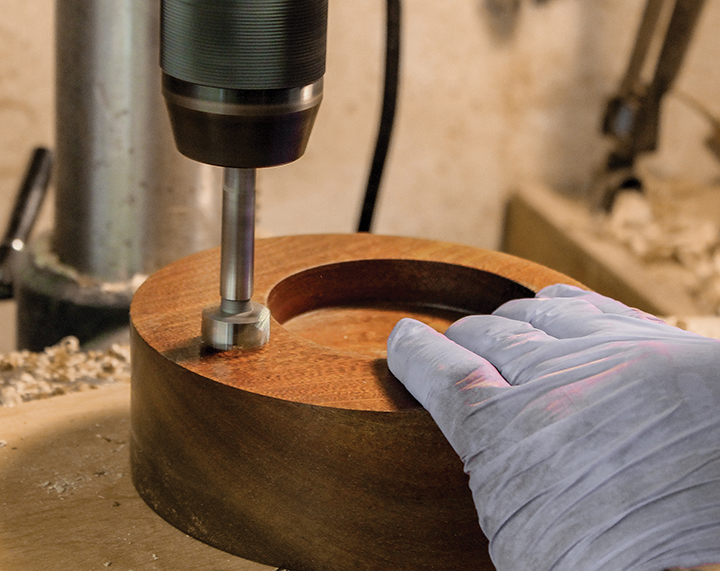
16 & 17 Off the lathe, I drill a 7/8" hole, 1" deep to accept the matching wine stopper.
The Wine Stopper - Up until recently, I have always used natural cork for my wine stoppers, I have now switched to the Ruth Niles Stainless Steel Stoppers. They are more expensive but, faster and easier to make.
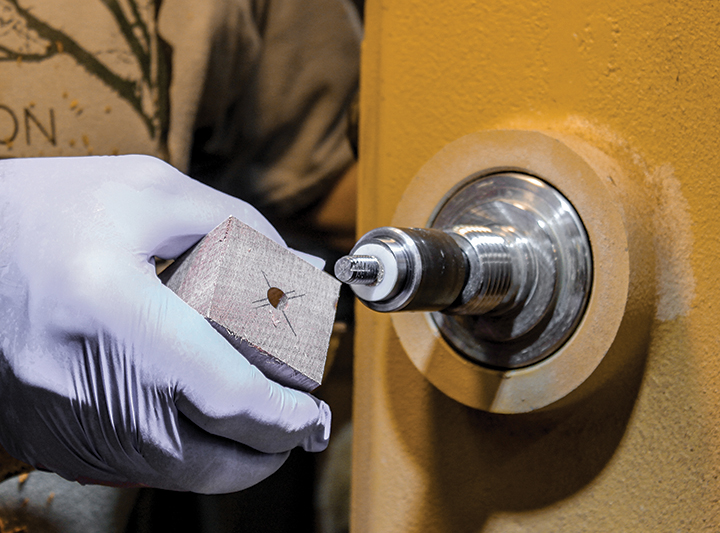
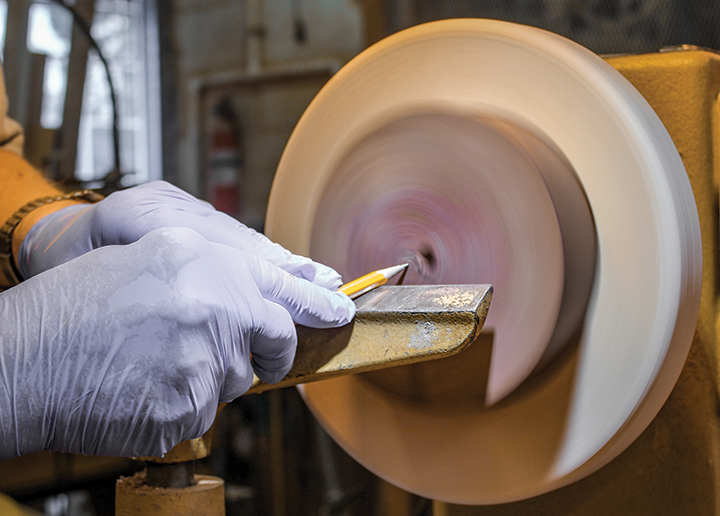
18 I start with a blank 1-1/2" square and 1-1/4" long. I locate the center and drill a 11/32" hole 1" deep. The new mandrel from Niles is self-tapping and made to directly screw the blank on to it.
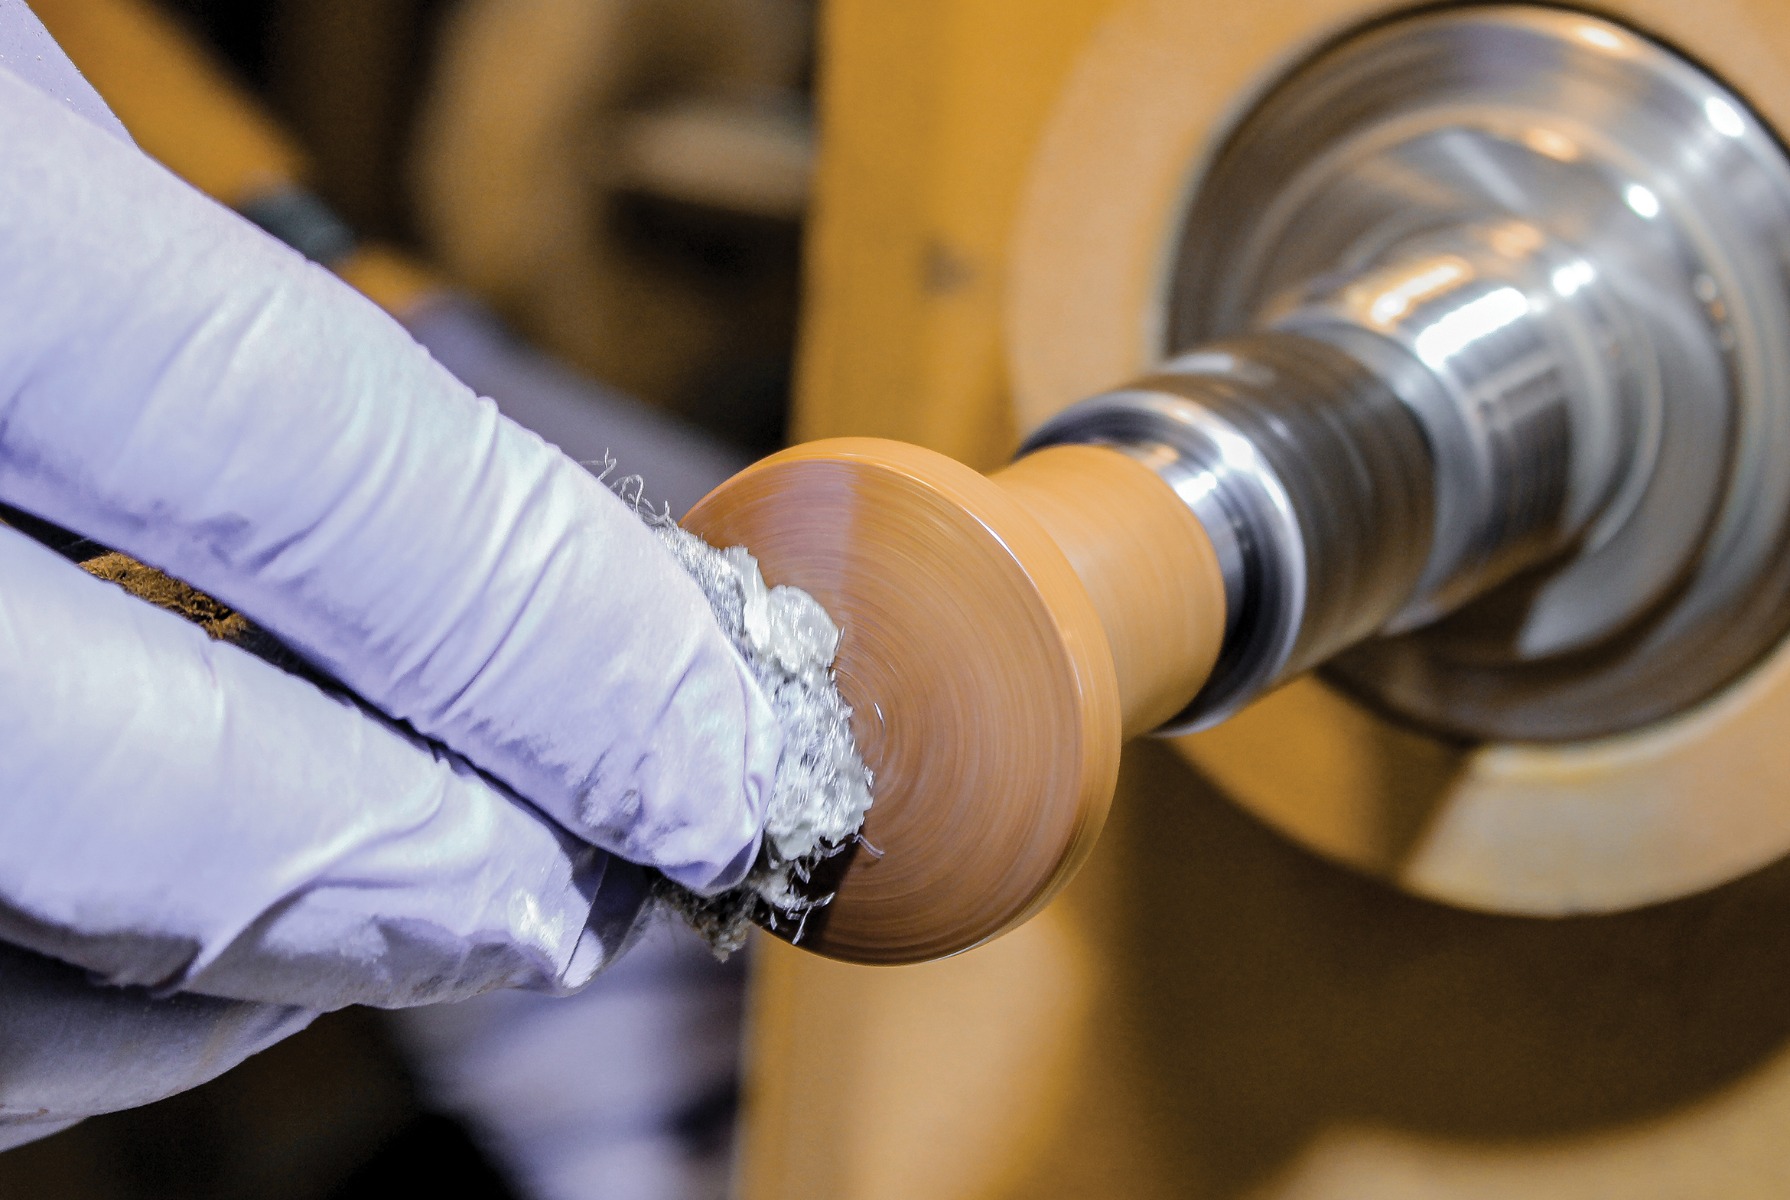
19 I turn the stopper to a pleasing shape and finish following the same steps as the coaster.
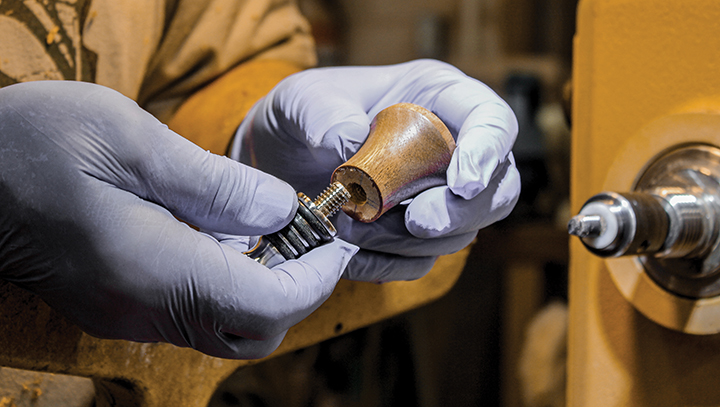
20 After all is done, the finished coaster and stopper are buffed off the lathe. I add a 1/8" thick x 3-1/2" cork to the recess to absorb drips from my favorite red wine. For special occasions, I have the space on the surface of the coaster laser engraved with names and date to make a great wedding or hostess gift.
The vacuum chuck might seem like a lot of effort if you’re only going to make one wine coaster, but once you have vacuum chucking on your lathe, you’ll wonder how you ever got along without it. It’s obviously handy for multi-axis projects, but even something as simple as reverse turning a bowl becomes easier, quicker and more accurate with vacuum chucking.